How to Create a GitHub Action to build a container image

In this article, you’ll complete the following tasks: Create a GitHub Action to implement a build pipeline Modify the coupon service code to trigger the build workflow Monitor the build workflow’s progress in real time, Update a failing unit test to fix the build.

Create the build action

Create a GitHub Action for the build with the following steps:

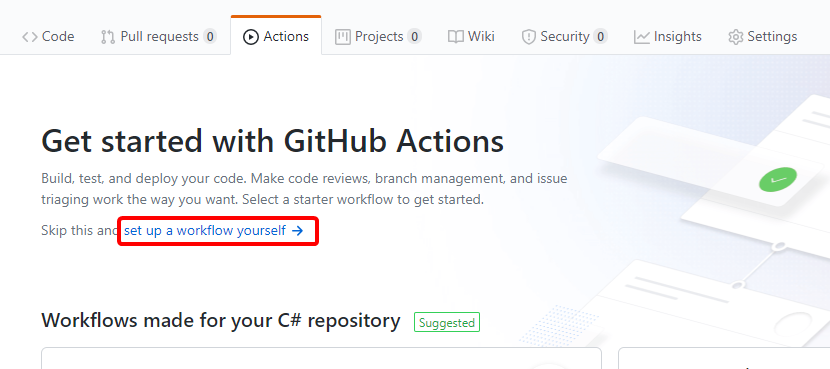
  1. Select the Actions tab in your repository and select the set up a workflow yourself link: custom-github-workflow
  2. Replace the YAML in the editor with the following YAML:
    name: eShop build
    
    on:
      push:
        paths:
        - 'src/Services/Coupon/**'
        - 'tests/Services/Coupon/**'
        branches: [ main ]
    
    jobs:
      build-and-push-docker-image:
        runs-on: ubuntu-latest
        steps:
        - name: Get code from the repository
          uses: actions/checkout@v1
          with:
            ref: main
    
        - name: Run unit tests
          run: dotnet test tests/Services/Coupon/*.Tests/*.csproj
          env:
            DOTNET_CLI_TELEMETRY_OPTOUT: true
            DOTNET_NOLOGO: true
    
        - name: Build and push Docker image
          uses: docker/build-push-action@v1.1.0
          with:
            username: ${{ secrets.REGISTRY_USERNAME }}
            password: ${{ secrets.REGISTRY_PASSWORD }}
            registry: ${{ secrets.REGISTRY_LOGIN_SERVER }}
            path: .
            dockerfile: './src/Services/Coupon/Coupon.API/Dockerfile.acr'
            repository: 'coupon.api'
            tags: 'linux-latest'
            push: true
    

    The preceding YAML defines a GitHub Action that:

    • Is triggered when a commit is pushed to the coupon service’s source code or unit tests in the main branch.
    • Defines step-specific environment variables. For example, the Run unit tests step defines DOTNET_CLI_TELEMETRY_OPTOUT and DOTNET_NOLOGO. With regards to the .NET Core CLI, those environment variables opt out of usage data collection and suppress the first-run telemetry message, respectively.
    • Has one job—a set of steps that execute on the same workflow runner—named build-and-push-docker-image. The job:
      • Executes the xUnit tests for the coupon service.
      • Builds the Docker image and pushes it to an ACR instance. ACR is a private container registry used for the modified coupon container image. You don’t have permission to modify the Microsoft-owned container registry from which the original image was retrieved.
      • Runs in an ubuntu-latest runner and has three steps, two of which use actions available from the GitHub Actions marketplace:
        • Get code from the repository uses the actions/checkout@v1 action to check out the main branch.
        • Build and push Docker image uses the docker/build-push-action@v1.1.0 action to build the container image and push it to ACR.

     Important

    Trigger conditions and other artifacts of GitHub Actions or workflows depend on the apps and environments. For ease of understanding, details are kept simple here. Both the build and the deploy workflows are scoped to coupon service changes because all the microservices are kept under a single repository. In an actual production scenario, each microservice is kept in a separate repository.

  3. Replace the default workflow file name of main.yml with build.yml:
  4. Select the Start commit button, select the Commit directly to the `main` branch radio button, and select Commit new file to save the workflow file.

Trigger a build

You’ve finished creating the build workflow for your CI/CD pipeline on Cloud Hosting. The Marketing department wants to start a campaign to better track discount code usage. With this feature, Marketing can better understand which discount codes are most effective in boosting sales. To support this feature, make the following changes in the main branch:

  1. Select the Code tab in your fork of the repository.
  2. Select the edit icon to open the src/Services/Coupon/Coupon.API/Controllers/CouponController.cs file in the editor:
  3. Replace the comment // Add LogInformation call with the following code:
    _logger.LogInformation("Applying coupon {CouponCode}", code);
    

    The preceding code logs the discount code being applied.

  4. Select the Commit directly to the `main` branch radio button and select the Commit changes button.The build workflow is triggered automatically.


Monitor the build

View the real-time progress of the build by completing the following steps:

  1. Select the Actions tab.
  2. Select the most recent workflow run listed for the eShop build workflow. The commit message used in the previous step becomes the run’s name.
  3. Select the build-and-push-docker-image task.
  4. Wait a few minutes. Notice that:
    • The build fails on the Run unit tests step.
    • The Build and push Docker image step doesn’t run because the previous step failed.


Fix the build

  1. From the Code tab, edit the tests/Services/Coupon/Coupon.API.Tests/Controllers/CouponControllerTests.cs file. In the CouponControllerTests.cs file, notice that Assert.True(false); causes the unit test to fail. Replace that line with the following code:
    Assert.True(true);
    

    The preceding code causes the test to always pass. This test is for illustrative purposes only. Real tests should test actual functionality.

  2. Commit and push this change to the main branch.The build workflow is triggered automatically.

When the build completes successfully, all steps are prefixed with a green check mark. Expand any task for the output generated during its execution. For example:


 Notes:

It’s possible to move the dotnet test command to the Dockerfile. In this example, you’re running dotnet test in the GitHub Action to:

  • Understand how to execute .NET Core CLI commands in GitHub Actions.
  • Understand how the failure of a step can prevent execution of the remaining build steps.

In this unit, you created a GitHub Action to build the coupon service. You added logging to the coupon service and saw how committing that code triggered the build workflow. Next, you fixed a failing unit test and triggered the build again. Finally, you learned how to monitor the build’s progress in real time.

How to Move an app to Azure Cosmos DB table storage

Companies that use Azure Storage tables for business-critical applications may find that Azure Cosmos DB provides a better service for their needs.

Suppose that your lenses database, which is implemented in Azure Storage tables, has been working well. The company has recently expanded into several new countries, and you have found that the performance of the database is not always as good in those countries as it is in your country. Your technical director has asked you to determine if there is a way to eliminate these problems without rewriting the app that uses the database.

Here, you will learn how Azure Cosmos DB provides a more scalable alternative to Azure Storage tables and does not require developers to rewrite code.

Features of Azure Storage tables

Azure Storage is a service that provides the following data services:

FEATURES OF AZURE STORAGE TABLES
Data Service Description
Blob storage Store, secure, and access Binary Large Objects (Blobs). Blobs can be any file and this service is often used with image, videos, and other media.
Queue storage Store messages in a queue to organize communications between systems. Queues help to improve communications, because messages won’t be lost at times of high demand. Instead, the queue may lengthen, but the receiving component keeps picking up and processing the messages until it catches up.
File storage Store files in file shares in the cloud for access with the Server Message Block (SMB) protocol.
Table storage Store data in a NoSQL database to underpin applications.

In this module, we’ll concentrate on Azure Storage tables. This service provides a way to store semi-structured data in the cloud. The data is highly available to clients because it is replicated to multiple nodes or locations.

Storage tables are an example of a NoSQL database. Such databases don’t impose a strict schema on each table like a SQL database does. Instead, each entity in the table can have a different set of properties. It’s up to you to ensure that these properties are organized, and to ensure that apps that query the data can work with results that may have different values. A primary advantage of this semi-structured approach to data is that the database can evolve more quickly to meet changing business requirements.

Tables in Azure Storage can scale to large quantities of data; you can store any number of tables and any number of entities in a table. The only limits are the capacity of the storage account, which depends on the type of storage account you created. For example, a standard storage account can store 2 PB of data in US and European data centers, or 500 TB in other locations.

Azure storage accounts replicate data to multiple locations to ensure high-availability. You can choose from the following types of replication in a storage account:

TABLE 2
Replication Type Description
Locally redundant storage Data is replicated to a different storage scale unit with the same data center. This data remains available if a single node fails in the data center. Your data may be unavailable if an entire data center fails.
Zone-redundant storage Data is replicated to three storage clusters in a single region. This data remains available if a single data center fails. Your data may be unavailable if there is a region-wide outage.
Geo-redundant storage Data is replicated to a secondary region, hundreds or thousands of miles from the primary region. This data remains available even if there is a region-wide outage.
Read-access geo-redundant storage Data replicated to a secondary region, where it is available for clients to read. You can use this replication to provide a source of data that is closer to users than the primary. Closer data can improve performance by avoiding the need to read data from hundreds or thousands of miles away.

Features of Azure Cosmos DB

Azure Cosmos DB is Microsoft’s globally distributed, multi-model database service with Azure.

Multi-model means that you can use one of many data access methods and APIs to read and write data. For example, you can use SQL, but if you prefer a NoSQL approach, you can use MongoDB, Cassandra, or Gremlin. Azure Cosmos DB includes the Tables API, which means that if you move your data from Azure Storage tables into Azure Cosmos DB, you don’t have to rewrite your apps. Instead, you just change their connection strings.

Azure Cosmos DB can replicate data for read and write access to multiple regions. Clients can connect to a local replica both to query but also to modify data, which is not possible in Azure Storage tables.

Differences between Azure Storage tables and Azure Cosmos DB tables

There are some differences in behavior between Azure Storage tables and Azure Cosmos DB tables to remember if you are considering a migration. For example:

  • You are charged for the capacity of an Azure Cosmos DB table as soon as it is created, even if that capacity isn’t used. This charging structure is because Azure Cosmos DB uses a reserved-capacity model to ensure that clients can read data within 10 ms. In Azure Storage tables, you are only charged for used capacity, but read access is only guaranteed within 10 seconds.
  • Query results from Azure Cosmos DB are not sorted in order of partition key and row key as they are from Storage tables.
  • Row keys in Azure Cosmos DB are limited to 255 bytes.
  • Batch operations are limited to 2 MBs.
  • Cross-Origin Resource Sharing (CORS) is not currently supported by Azure Cosmos DB.
  • Table names are case-sensitive in Azure Cosmos DB. They are not case-sensitive in Storage tables.

While these differences are small, you should take care to review your apps to ensure that a migration does not cause unexpected problems.

How to choose a storage location

Each organization has different priorities for their NoSQL database system. Once you have identified those priorities, use this table to help you choose whether to use Azure Storage tables or Azure Cosmos DB tables to persist data for your applications:

HOW TO CHOOSE A STORAGE LOCATION
Priority Azure Storage Tables Azure Cosmos DB Tables
Latency Responses are fast, but there is no guaranteed response time. < 10 ms for reads, < 15 ms for writes
Throughput Maximum 20,000 operations/sec No upper limit on throughput. Over 10 million operations/sec/table.
Global distribution Single region for writes. A secondary read-only region is possible with read-access geo-redundant replication. Replication of data for read and write to more than 30 regions.
Indexes A single primary key on the partition key and the row key. No other indexes. Indexes are created automatically on all properties.
Data consistency Strong in the primary region. If you are using read-access geo-redundant replication, it may take time for changes to reach the secondary region. You can choose from five different consistency levels depending on your needs for availability, latency, throughput, and consistency.
Pricing Optimized for storage. Optimized for throughput.
SLAs 99.99% availability. 99.99% availability for single region and relaxed consistency databases. 99.999% availability for multi-region databases.


Read more about web hosting


How to migrate an app to Azure Cosmos DB

If you have decided to move to Azure Cosmos DB, and you currently have data in one or more Azure Storage tables, you must consider how to move that data into Azure Cosmos DB. Microsoft provides two tools to complete this task:

  • The Azure Cosmos DB Data Migration Tool. This open-source tool is built specifically to import data into Azure Cosmos DB from many different sources, including tables in Azure Storage, SQL databases, MongoDB, text files in JSON and CSV formats, HBase, and other databases. The tool has both a command-line version and a GUI version. You supply the connection strings for the data source and the Azure Cosmos DB target, and you can filter the data before migration.
  • AzCopy. This command-line only tool is designed to enable developers to copy data to and from Azure Storage accounts. The process has two stages:
    • Export the data from the source to a local file.
    • Import from that local file to a database in Cosmos, specifying the destination database by using its URL and access key.

data import

How to Create a pool of compute nodes to run Azure Web Hosting

To run a web hosting batch job, we need to add a pool to our Batch account. A pool contains compute nodes, which are the engines that run your Batch job. You specify the number, size, and operating system of nodes at creation time. In this exercise, you’ll modify the web hosting console app you made in the previous exercise to add a pool to your web hosting Batch account

Your company wants to control the costs of the app, and have asked you to use a fixed number of nodes.

Add settings for your new pool

In the web hosting Cloud Shell, edit the Program.cs file in the editor:

code Program.cs

Add the following properties to the Program class in Program.cs:

private const string PoolId = "WinFFmpegPool";
private const int DedicatedNodeCount = 0;
private const int LowPriorityNodeCount = 3;
private const string PoolVMSize = "STANDARD_D2_v2";
private const string appPackageId = "ffmpeg";
private const string appPackageVersion = "3.4";

The above settings will be used in the code to create the pool. Looking at each variable we can explain them as follows.

  • PoolId: The name our code will use to reference the pool in other web hosting batch client calls.
  • LowPriorityNodeCount: You are going to create a pool with three low-priority virtual machines (VMs)
  • PoolVMSize: The VMs will be STANDARD_A1_v2, which gives the nodes 1 CPU, 2 GB of RAM, and 10 GB of SSD storage
  • appPackageId: The name of the application package to use on the nodes you create
  • appPackageVersion: The version of the application to use on the nodes you create

Update the Main() method to support asynchronous calls on webhosting.

We’ll be making several asynchronous calls to web hosting cloud services, so the first thing to do is to make Main asynchronous. With C# .NET version 7.1 and onwards, async Main methods in console applications are supported.

  1. Change the web hosting console app to allow async method calls, by first adding System.Threading.Tasks library.
using System.Threading.Tasks;
using System.Collections.Generic; // Also add generics to allow the app to use Lists

Next, update the Main method signature as follows:

static async Task Main(string[] args)

Create a pool

  1. Add the following new method to the Program class to create a Batch pool. The method will:
    • Create an image reference object to store the settings for the nodes to be added to the pool.
    • Use the image reference to create a VirtualMachineConfiguration object on your web hosting.
    • Create an unbound pool using the properties declared above and the VirtualMachineConfiguration.
    • Add an application package reference to the pool.
    • Create the pool on Azure web hosting.
    • Take two parameters, the batchClient and PoolId.
private static async Task CreateBatchPoolAsync(BatchClient batchClient, string poolId)
    {
        CloudPool pool = null;
        Console.WriteLine("Creating pool [{0}]...", poolId);

        // Create an image reference object to store the settings for the nodes to be added to the pool
        ImageReference imageReference = new ImageReference(
                publisher: "MicrosoftWindowsServer",
                offer: "WindowsServer",
                sku: "2012-R2-Datacenter-smalldisk",
                version: "latest");

        // Use the image reference to create a VirtualMachineConfiguration object
        VirtualMachineConfiguration virtualMachineConfiguration =
        new VirtualMachineConfiguration(
            imageReference: imageReference,
            nodeAgentSkuId: "batch.node.windows amd64");

        try
        {
            // Create an unbound pool. No pool is actually created in the Batch service until we call
            // CloudPool.CommitAsync(). This CloudPool instance is therefore considered "unbound," and we can
            // modify its properties.
            pool = batchClient.PoolOperations.CreatePool(
                poolId: poolId,
                targetDedicatedComputeNodes: DedicatedNodeCount,
                targetLowPriorityComputeNodes: LowPriorityNodeCount,
                virtualMachineSize: PoolVMSize,
                virtualMachineConfiguration: virtualMachineConfiguration);  

            // Specify the application and version to install on the compute nodes
            pool.ApplicationPackageReferences = new List<ApplicationPackageReference>
            {
                new ApplicationPackageReference
                {
                ApplicationId = appPackageId,
                Version = appPackageVersion
                }
            };

            // Create the pool
            await pool.CommitAsync();
        }
        catch (BatchException be)
        {
            // Accept the specific error code PoolExists as that is expected if the pool already exists
            if (be.RequestInformation?.BatchError?.Code == BatchErrorCodeStrings.PoolExists)
            {
                Console.WriteLine("The pool [{0}] already existed when we tried to create it", poolId);
            }
            else
            {
                throw; // Any other exception is unexpected
            }
        }
    }

Call CreateBatchPoolAsync from our Main method. The Main method should now be the following:

static async Task Main(string[] args)
{
    // Read the environment variables to allow the app to connect to the Azure Batch account
    batchAccountUrl = Environment.GetEnvironmentVariable(envVarBatchURI);
    batchAccountName = Environment.GetEnvironmentVariable(envVarBatchName);
    batchAccountKey = Environment.GetEnvironmentVariable(envVarKey);

    // Show the user the batch the app is attaching to
    Console.WriteLine("URL: {0}, Name: {1}, Key: {2}", batchAccountUrl, batchAccountName, batchAccountKey);

    // The batch client requires a BatchSharedKeyCredentials object to open a connection
    var sharedKeyCredentials = new BatchSharedKeyCredentials(batchAccountUrl, batchAccountName, batchAccountKey);
    var batchClient = BatchClient.Open(sharedKeyCredentials);

    // Create the Batch pool, which contains the compute nodes that execute tasks.
    await CreateBatchPoolAsync(batchClient, PoolId);
}

Test the app

  1. Select the ellipses in the top-right corner of the code editor.
  2. Select Close Editor, and in the dialog select Save.
  3. In the webhosting Cloud Shell, compile and run the app with the following command.
dotnet run

The app will take a few minutes to run, and output:

URL: <your batch account url, Name: <your batch name>, Key: <your batch key>
Creating pool [WinFFmpegPool]...


Remember that each node is a VM running Windows 2012 server, with only one CPU and 2 GB of ram. It takes time for the Batch to transfer those Windows VM images from the webhosting Azure Virtual Machine Marketplace, create the VM infrastructure and networking, and finally start each node. This is the most time consuming part of most Batch solutions. A typical Batch workflow doesn’t clean up the pool and its nodes.