Imagine you are working on an e-commerce site. You want to ensure that your product pages can be found through a search engine and that they load quickly. Regardless of what tech approach you choose, you want to ensure you use something that follows best practices for architecture. The frameworks and techniques you select should be commonly used so you can find help if you need it.
One way to approach building an app like this is to use a static site generator. With a static site generator, you can assemble a static site from content and data in all sorts of places like inside of JSON, XML, YAML files, or in a database, or even a third-party service accessible through the Web. Producing these static pages is for that reason a bit of a complex process. Using a static site generation tool to produce these static pages have therefore become a necessity.
Once you have produced these static pages, you need to think about how to deploy them to the Web. To stay competitive, you need a service that can allow for easy and fast deployment of our pages. The less time you spend on configuring your app deployment, the more time you can spend on improving its features.
In this module, you will use the Gatsby command-line tools to create a new web app. You’ll create a page in the app and add content to it with Gatsby’s querying tools. Lastly, you will deploy your app to the web using the Azure Static Web Apps service.
By the end of the tutorial, you will be able to create web apps with Gatsby and publish them to the web.
Static websites have been around since the web’s inception. At their essence, static web sites are made up of HTML, CSS and JavaScript, which are served to the user. A Static Site Generator (SSG) is a tool that can take higher level tools and generate these static assets.
Gatsby is one such tool that we can use to create a static website. It uses React as a UI layer and GraphQL as a query language to access data available within the site.
Gatsby is built on top of React and React Router, which allows you to mix both dynamic and static parts. So even though it’s a tool for primarily producing static sites, it’s fully capable of compiling a React project. Thereby Gatsby can replace your normal set-up for producing apps with React, providing you have part of your React app that you want to make static.
Gatsby has a clever system of plugins that can help import data from different types of data sources. The data sources can be as varied as databases to JSON to your local file system. All this imported data can then be paired up with static assets like HTML and CSS to produce the static pages you want to serve to a user. Thanks to the plugin system, more and more different types of data sources can be supported and is being supported as soon as the Gatsby team or the community writes a new plugin.
How does Gatsby do this? In the pre-compilation phase, each plugin scans a source. A source can be a file system, a database, or, for example, a set of JSON files. The data is read and added to a data Graph. The Graph is an in-memory tree of nodes that you can query for. Gatsby then lets you query for these nodes when you proceed to author your static pages in your app.
Installing and using Gatsby
Gatsby is available via the gatsby-cli JavaScript package. You have two ways you can use it:
- Global install, run
npm install gatsby-cli -g, this will install the executablegatsbyon your machine. You can now use Gatsby like so,gatsby <command>. - Use npx,
npxis a tool that makes it possible to run executable files without first installing them on your machine. If you use this way of installing you need to prefix your calls to Gatsby like sonpx gatsby <command>.
These three commands will get you started working with a new Gatsby app:
gatsby new <project name> <optional GitHub URL>: Use this command to generate a new project. It takes a name as a mandatory argument and optionally a GitHub URL as the second argument. Using the latter argument will create a Gatsby project based on an existing Gatsby project on GitHub.gatsby develop: Start a development server where your project can be accessed. A development server is an HTTP server able to host your files so you can access them from your browser. You will find your Gatsby app running on addresshttp://localhost:8000. It will also start an instance of GraphiQL, which is a graphical development tool you can use to explore the data available to your app and build queries. You can use GraphiQL by browsing tohttp://localhost:8000/___graphql.gatsby build: Create a deployable static representation of your app. All the resulting HTML, JavaScript, and CSS will end up in the sub directorypublic.
Project anatomy
A scaffolded Gatsby project consists of some parts that you need to understand to work with Gatsby effectively and efficiently.
/pages: React components placed in this directory will become routes and pages.gatsby-config.js: A configuration file. Part of the configuration will be used to set up and configure plugins and part of it is global data that you can render on your pages.gatsby-node.js: A file used to implement life-cycle methods of the Gatsby API. In here you can do things such as sourcing files, add/update nodes to the Gatsby graph and even bring in data from the outside that should be part of the website./styles: Gatsby lets you apply styles in many ways, everything from imported CSS, SASS, and LESS to CSS Modules./components: For React components meant as helper components like header, layout and more.
In this unit, you’ll create a new Gatsby application and add a single page to it.
Install Gatsby
Run the following command in a terminal to install Gatsby globally to your system:
npm install -g gatsby-cli
Create and run a Gatsby site
All Gatsby projects are created by the Gatsby CLI. The CLI is able to help you with scaffolding a new Gatsby project, host it and also build the final product, which is a static set of files that you can deploy into any static host you wish.
Create a Gatsby app
Now, create a new Gatsby app by typing the following command in the terminal:
gatsby new myApp
gatsby new creates a new Gatsby application, to which you can start adding content pages.
Run Gatsby
To start developing with Gatsby, you need to navigate to the project directory before starting the development server.
Run the following commands to move to your project folder and start the server:
cd myApp
gatsby develop
You should see the following output in the terminal:
You can now view gatsby-starter-default in the browser.
  http://localhost:8000.
View GraphiQL, an in-browser IDE, to explore your site's data and schema
  http://localhost:8000/___graphql
Now open up a browser and navigate to http://localhost:8000.

If you see the above, you successfully created your first Gatsby app. Congrats!
Add a page component
Now you’ll create a component that you can navigate to in the browser: a page component.
Open the “myApp” project folder in your text editor. Find the pages/ directory and create a file and name it about.js. Give the file the following content:
import React from 'react';
import { Link } from 'gatsby';

export default () => (
  <React.Fragment>
    <div>About page</div>
    <Link to="/">Back to home</Link>
  </React.Fragment>
)
The code above creates a presentation component that is only able to show data. This component simply renders the text “About page” and a link that point to the root of the application.
Once you’ve pasted in the code above and saved it in the file about.js, the development server will recompile the application automatically. If you now visit http://localhost:8000/about you should see the following content rendered:
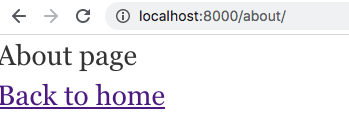
You’ve got your first page! Now you can see how any component placed in the /pages directory can be navigated to.
Add data to Gatsby app
Gatsby has a system of plugins that scans various data sources and places the resulting data in an in-memory object, the data graph. It does all this at build time, so when you are crafting a new page you can assume the data from that graph is available.
Tools
The data graph is something you can interact with. Once you start up the development server, the data graph will be available on http://localhost:8000/___graphql. This will render the data graph in a tool called GraphiQL.
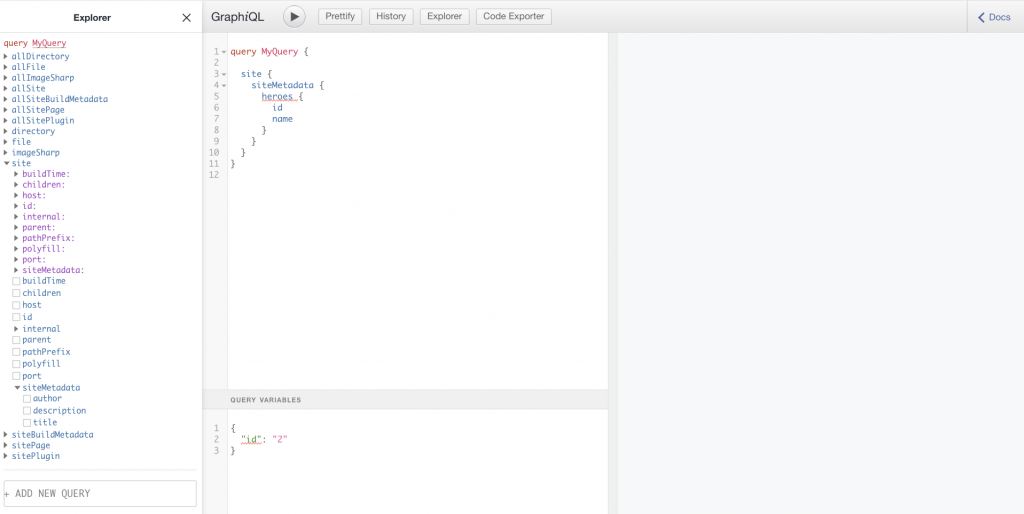
GraphiQL allows you to do the following:
- Navigate: Drill down into the data graph and its content by expanding nodes to find just the data you need.
- Construct queries: As you drill down into the graph, the tool will craft a query for you. You can also edit the query text as you see fit to see the results.
- Browse results: Run the query you construct to see it rendered in the tool. You will know exactly what response a query renders before venturing on to include it in a component.
Use data in a page component
When you create a page component that wants to use data from the above mentioned graph, there are three things you will do:
- Define a query. Craft a query in the GraphQL query language that asks for a resource and some columns on that resource.
- Write the code to Execute the query. In your page’s
.jsfile, call thegraphql()function with your query as an input and store the result in a variable namedquery. Here’s an example:export const query = graphql ("query {} ");Naming the variable
queryis an important convention: Gatsby will automatically process thequeryvariable, fetch the data and insert it into the React component in the same file. - Create a parameterized component that uses the data. Create a React component with a
dataparameter. When you build the application,datawill be populated with the answer from your query. The shape of the result looks exactly like the query you authored. Inside of the rendering section of your component you can now read from thedataproperty and layout its data in the template in a way you find appropriate.
A plugin example: loading images from files
Data can be almost anything. Gatsby helps you pull in data and place it in its data graph using plugins. The plugin gatsby-source-filesystem looks at your file system and populates its data graph based on that. What it does is that it looks through the file system, on a place we specify and makes the results available in the Graph. Let’s have look at how this plugin is configured in gatsby-config.js:
{
  resolve: `gatsby-source-filesystem`,
  options: {
    name: `images`,
    path: `${__dirname}/src/images`,
  },
},
The path property tells us where this plugin should look for files. In our case, it looks for __dirname, which is the current working directory and specifically the sub directory /images. At pre-compilation time Gatsby will now look through the image/ directory and collect information on the files. It will also add that information to Gatsby’s in-memory data graph.
So how do we use information on images that we configured via the gatsby-source-filesystem plugin? As the plugin scans the images/ directory it collects information such as path, type, size, and dimensions. We can then query for this information from the in-memory data graph and use it to render the image via its path that is stored in the graph. Additionally, we can perform various image manipulations on the image before displaying it, like scaling for example. The image manipulation functionality is something built into Gatsby and not provided by the plugin. However, the built-in functionality and this plugin really work in tandem to make it a great experience to work with image assets.
Any additional plugins you add to Gatsby follow this pattern:
- Download the plugins via NPM.
- Configure the plugin via the
gatsby-config.jsfile.
Gatsby’s querying capabilities let you build a static site from data gathered from many different sources.
Here, you’ll build a query to capture some data from a configuration file and render it into a page.
Add data to your component
The way you work with data in Gatsby is powerful. Gatsby can query for data from almost anywhere, from your files, from static data and even data from API endpoints and databases. To query for data, we’ll use GraphQL.
gatsby-config.js is where you store metadata for your site along with configurations of the plugins in a JavaScript object. There’s a property in said JavaScript object called siteMetadata. This property along with its values gets read into the data graph as part of the build process and gets stored in a node called site. You’ll see how querying for data works by constructing an About component to query for title and description.
Below is a depiction of what the siteMetadata property looks like:
siteMetadata: {
  title: `Gatsby Default Starter`,
  description: `Kick off your next, great Gatsby project with this default starter. This barebones starter ships with the main Gatsby configuration files you might need.`,
  author: `@gatsbyjs`,
}
We can construct a query given the above, read out the data and have a component render it.
Start development server
Start the development server by typing the following command at the root of your project:
gatsby develop
You should now have two routes up and running:
http://localhost:8000/, where your app is renderedhttp://localhost:8000/___graphql, where the built-in data graph is displayed with GraphiQL
Construct a query
Go to http://localhost:8000/___graphql in your browser so you can get help creating the query.
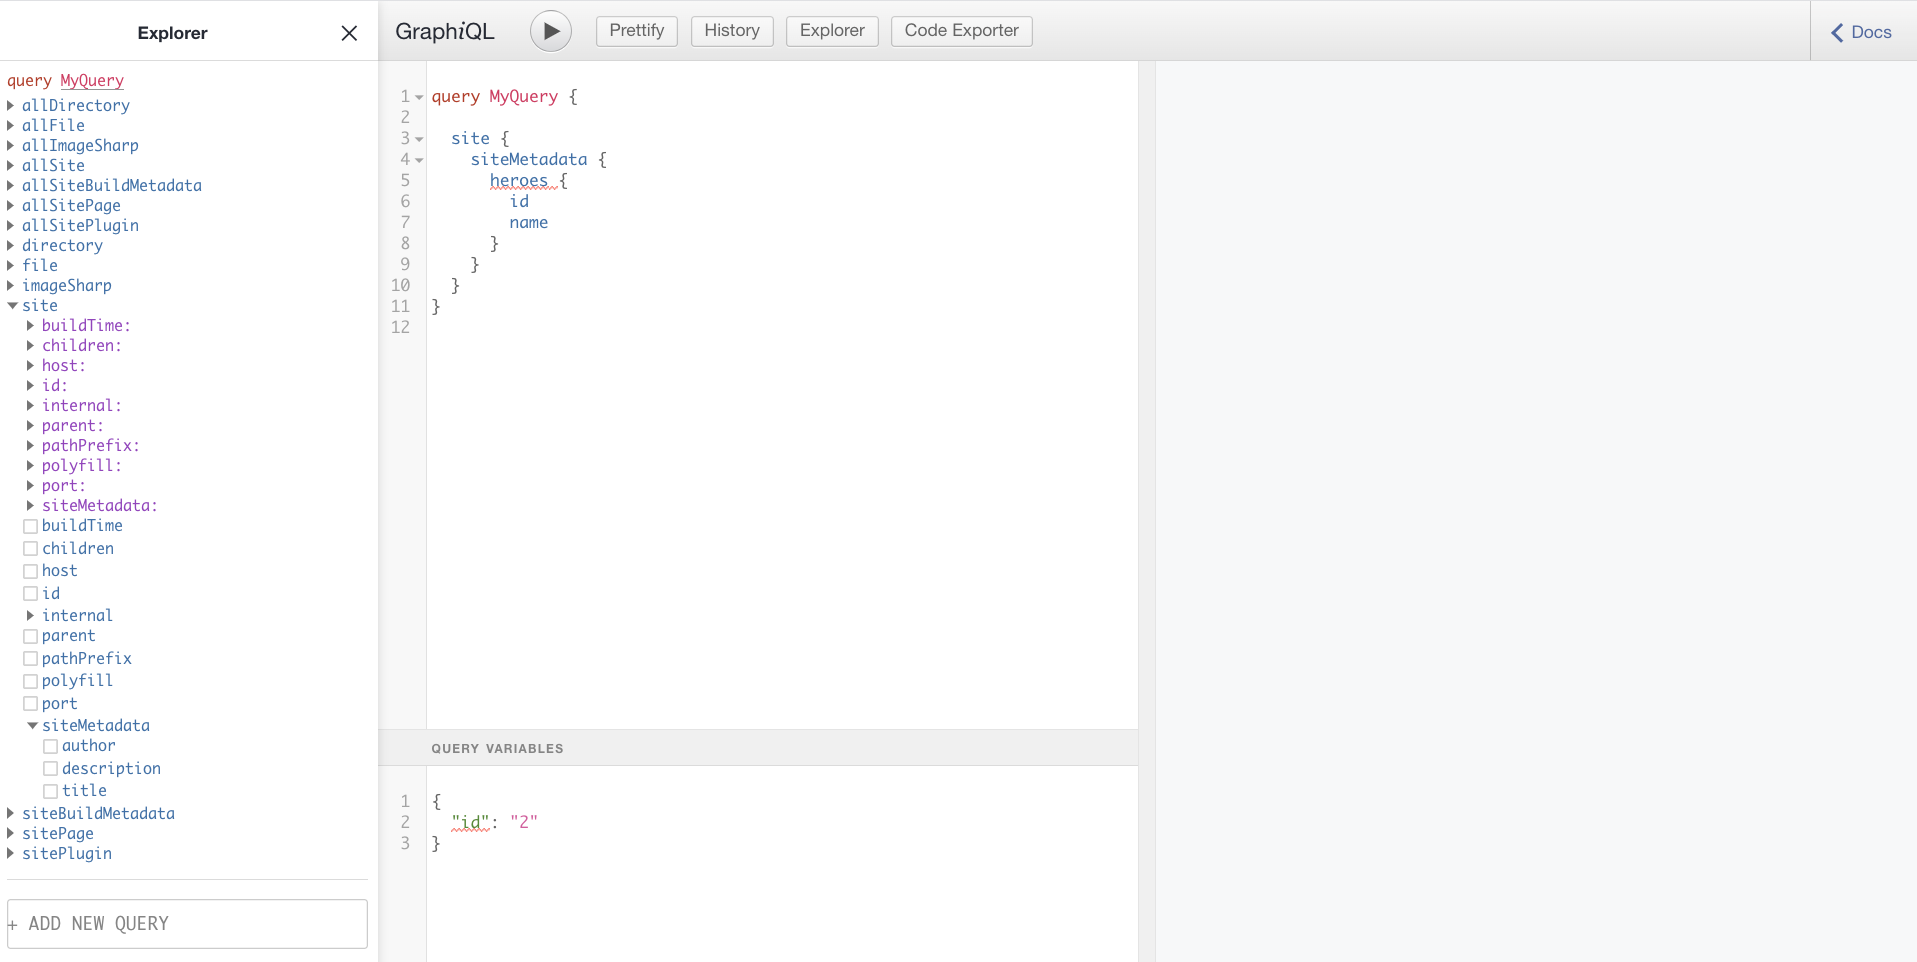
In the above image, you can see the Explorer section on the left. You can use the Explorer to drill down into our Graph until you find the data we need. In the middle section, you can see how the query is written for you as you perform selections on the left. On the right, you see the result of running the query. You can run the query by clicking the play button in the middle section.
Select the following constructed query from the middle section:
site {
  siteMetadata {
    author,
    description,
    title
  }
}
Copy it to the clip board.
Return back to the editor and locate the file about.js in the pages/ directory. Change its content to the following code:
import React from 'react';
import { Link, graphql } from 'gatsby';

export default ({ data }) => (
  <React.Fragment>
    <h2>{data.site.siteMetadata.title}</h2>
    <div>{data.site.siteMetadata.description}</div>
    <Link to="/">Back to home</Link>
  </React.Fragment>
)

export const query = graphql `
  query {
    site {
      siteMetadata {
        author,
        description,
        title
      }
    }
  }
`
Here, you’re calling the graphql function using the query as an argument and assigning it to the variable query. It’s important that its called query so Gatsby knows to process it and put the result into the component and build time.
During build time Gatsby will input the query result into the component’s data property as indicated below, where you can reference it from your component’s JSX.
Save the file and browse to http://localhost:8000/about and you’ll see the following:
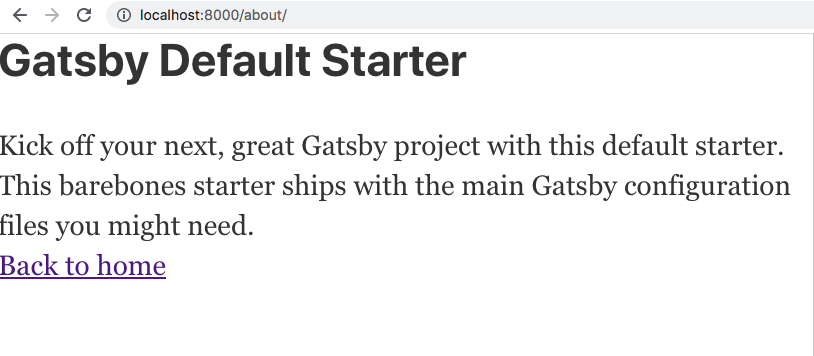
You’ve added data to your component with a GraphQL query! You also got to use the GraphiQL querying tool and Gatsby development server in the process.
Up to this point, we have focused on authoring our Gatsby app using React, GraphQL, and plugins. The next step after you’re done authoring, is to build your application. Following that, you are able to deploy to any web server or hosting service that can serve static files.
Build your app
Gatsby’s command-line tool provides a command to build your project to create something that you can deploy anywhere you like. The build consists of HTML, JavaScript, CSS, and any additional assets you’ve included.
Create the build
Gatsby runs the React compiler underneath, so when it produces the build, it does many things. It compiles the React code by translating the JSX to JavaScript and HTML. It also extracts all the JavaScript code, and places it in a set of bundles. Each bundle is then optimized meaning it has white space removed, variables are renamed, and expressions are generally optimized for speed. The styles go through a similar process. If you have chosen a library like LESS, SCSS, or Stylus for your CSS, there will be a preliminary step in which your CSS is being compiled from a high-level language to CSS. There are no further actions needed to deploy the files at this point. It’s just a set of static files that can be hosted from any webserver that can serve files.
Deploy the build
There are many technologies and services capable of hosting static apps. After all, it’s just HTML, CSS, and JavaScript, and can be hosted by most web services out there. For this tutorial, we’ll deploy to Static Web Apps, an Azure service that specializes in hosting static apps like those built with Gatsby.
Azure Static Web Apps
Static Web Apps is an Azure service that allows you to take some static files and serve them from the cloud. What you deploy is not a deployment package, but just a set of static files. This is a good fit for Gatsby as what Gatsby ends up producing from a build is static files.
Speaking of build, the service actually does the build step for you so there’s no need to build anything up front. How it does this is by locating the build command in the package.json of the Gatsby project. All you need to do is put your project in a GitHub repository.
Currently, your code sits in a directory on your machine, so you’ll need to do a few things to deploy Azure:
- Create a GitHub repository and push to it: Gatsby creates a Git repo for you, which will need to be pushed to GitHub.
- Create an Azure Static Web Apps instance: When you use the Azure portal to create an Azure Static Web Apps instance, you’ll provide the URL to your GitHub repository, and the name for the sub-directory where the static files live in your project. In Gatsby’s case, this directory is called
public/.
Azure Static Web Apps hosts static applications, like those made with Gatsby, by building the applications static assets and then deploying them to the cloud.
Here, you’ll build your app’s static assets to see what they look like and host them locally to try them out. Then, you’ll push your code to GitHub and create an Azure Static Web Apps instance to host your app on the web.
Build your site
When it comes to building your site and making it ready for deployment Gatsby does the heavy lifting for us.
Run the following command from your project directory:
gatsby build
This command will create a production build. All your files will end up in a sub directory public/.
Once the process finishes building, you can go to your public/ directory and open up the files in a browser. You can explore your build as it would be hosted in the web with http-server, a command-line tool that serves up local files over HTTP so you can see them in a browser.
Now you’ll serve up the whole application from a local web server. cd your terminal to the public/ directory and type the following command:
npx http-server -p 5000
Go to the browser on http://localhost:5000.
You should now see the following content rendered:

You’ve built your site and taken it from being a Gatsby app to a set of static pages containing nothing but HTML, CSS, and JavaScript!
Going into your public/ directory now locate your rendered about component at public/about/index.html. Because of an optimization process, all whitespace have been removed and the page is represented as one long line. However you should be able to locate the rendered title and description and it should look like this:
// excerpt from about/index.html

<h2>Gatsby Default Starter</h2><div>Kick off your next, great Gatsby project with this default starter. This barebones starter ships with the main Gatsby configuration files you might need.</div>
Push your code to GitHub
To prepare the app for deployment, we need to take the following steps:
- Initialize a Git repository
- Create a GitHub repository and push to the local Git repository to it
Add the About page
In the console, navigate to root of your project, then add the code to the repository index and commit it.
git add .
git commit -m "adding About page to site"
Create a GitHub repo and push the code
- Go to GitHub and log on. You should now be on a URL like so
https://github.com/<your username>?tab=repositories - Now click the
newbutton as indicated below:
- Name your repository
gatsby-appand clickCreate repositoryas indicated below: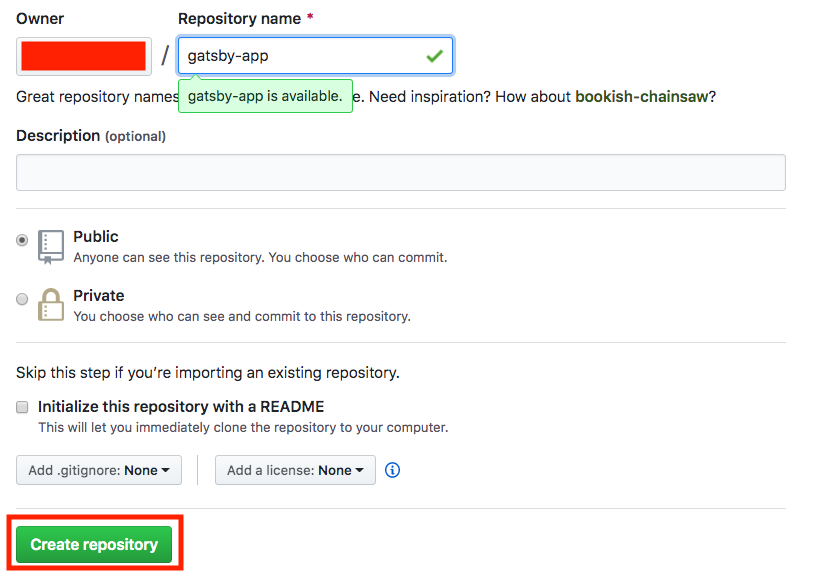
- Finally, add your GitHub repository as a remote and push. Type the following commands to accomplish that (Replace the
<user>part with your GitHub user name):git remote add origin https://github.com/<user>/gatsby-app.git git push -u origin main
You are now ready to deploy to Azure Static Web Apps!
Create a Static Web App
Now that you’ve created your GitHub repository, you can create a Static Web Apps instance from the Azure portal.
This tutorial uses the Azure sandbox to provide you with a free, temporary Azure subscription you can use to complete the exercise. Before proceeding, make sure you have activated the sandbox at the top of this page.
- Sign in to the Azure portal, making sure you use the same account to sign in as you did to activate the sandbox.
- In the top bar, search for Static Web Apps.
- Select Static Web Apps.
- Select Create.
Basics
Next, configure your new app and link it to your GitHub repository.
- Enter the Project Details
Setting Value Subscription Concierge subscription Resource Group [Sandbox resource group name] - Enter the Static Web Apps details
Setting Value Name Name your app. Valid characters are a-z(case insensitive),0-9, and_.Region Select Region closest to you SKU Free - Click the Sign-in with GitHub button and authenticate with GitHub
- Enter the Deployment Details
Setting Value Organization Select the Organization where you created the repository Repository gatsby-app Branch main - Use the Build Details drop down list to select Gatsby to populate the build information.
Setting Value App location Leave default Api location Leave default Output location public - Click the Review + create button

Review + create
Continue to create the application.
- Click the Create button
- Once the deployment is complete, click the Go to resource button
Review the GitHub Action
At this stage, your Static Web Apps instance is created in Azure, but your app not yet deployed. The GitHub Action that Azure creates in your repository will run automatically to perform the first build and deployment of your app, but it takes a couple minutes to finish.
You can check the status of your build and deploy action by clicking the link shown below:
View website
Once your GitHub Action finishes building and publishing your web app, you can browse to see your running app.
Click on the URL link in the Azure portal to visit your app in the browser.

Congratulations! You’ve deployed your first app to Azure Static Web Apps!
Summary – Create a Website for Free
You started with a challenge of addressing common problems in the web development space including SEO, page load speed and also ensuring you had a reliable architecture building out your app.
You evaluated the command-line tool Gatsby to address the above problems. Gatsby’s approach is to produce a set of static pages that loads fast and is easy for a search engine to index effectively.
Gatsby relies on React.js, GraphQL, and its in-memory data graph. Using JSON data from the in-memory graph, you can produce pages using React.js components with data and content from many sources.
You also saw how plugins extend Gatsby’s capability in handling different types of content. Plugins can source content and data from almost anywhere during the build process and place it in the built-in Graph you’ve learned to query. Learning to leverage plugins will prove useful for the future as you can continue to build out your app from different kinds of content like Markdown, JSON, and even service endpoints among many other content sources.
Additionally, you’ve learned how Gatsby produces a build, a deployable set of files consisting of nothing but HTML, CSS, and JavaScript. Building your app prepared it so it could be deployed almost anywhere.
Finally, you deployed your app. You learned about Azure Static Web Apps, a service that can host your Gatsby app in Azure. You used Static Web Apps to deploy your app in minutes.
Happy deploying!
