Do you want to change the CSS of a single page in WordPress? In other words: change the color of a button, the size of the text or the width of a border only on a specific page, leaving the rest of the site unchanged?
By following this guide, you can make the changes you want without the need to install additional plugins!
That’s right, your site already has all the tools you need to apply such personalization.
Changing the CSS of a single page: prerequisites
Before making any changes to your website’s CSS, whether it’s a simple color or major customization, install a child theme right away.
If you make the changes directly on the parent theme, when you update it you will lose everything, because the files will be overwritten.
The child theme, on the other hand, creates additional files that will not be changed with the theme update, so all your work will always be safe.
It also creates a full backup of your site.
If you don’t have much practice, there is a risk of making some mistakes and not knowing where to go to correct it.
Find more tips about child themes from Reddit r/wordpress r/ webhosting subreddit.
Done it all? Good! Now we can get to the heart of the discussion.
To follow this tutorial, you will need:
Basic knowledge of how to use CSS
CSS (Cascading Style Sheet) is a style sheet language used to customize the appearance of the elements of a web page.
Using CSS you can customize colors, fonts, borders, margins and much more.
CSS is simple and intuitive to use.
If you have no idea how CSS is used, don’t be afraid of coding and read our getting started guide.
In 15-20 minutes you will certainly have a clearer idea, guaranteed.
If you want to learn more, our WordPress video course also includes an entire module dedicated to this language.
I recommend that you take a look if you are interested in applying some more advanced customization.
A place to insert your CSS codes
That is, a field where you can insert your custom CSS within the theme (this is often found in the theme options)
OR
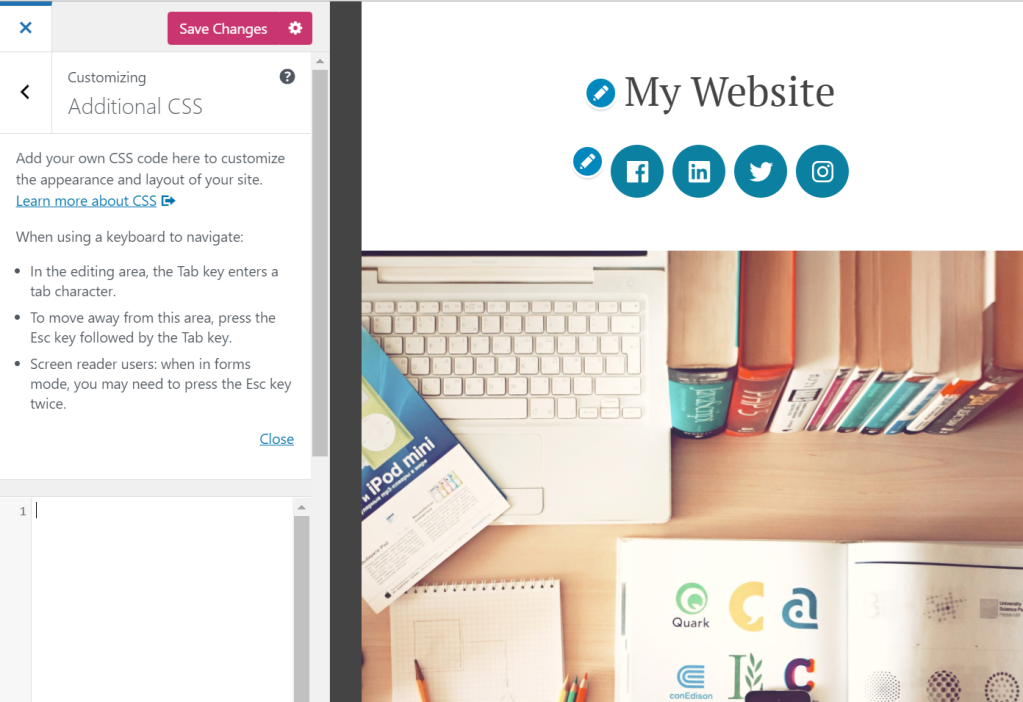
the native functionality of WordPress. Starting from version 4.7 of WordPress there is an additional CSS section within the Appearance> Customize area.
To see this feature, you must have installed WordPress version 4.7 or higher (if you have not yet updated WordPress, I recommend that you do so as soon as possible.
This is very important, especially to keep your site safe and running well).
Attention! Changes made to the CSS from the Customize panel are applied to the theme active on the site at the time of saving.
They will therefore not be visible if you subsequently install and activate another theme and, even in this case, you can lose them if you have not activated a child theme.
If neither of these two options is accessible to you, you will need to make the changes directly within the style.css file.
This is an option that works very well.
Of course, I will never tire of saying this, we are always referring to the child theme!
To better follow the tutorial, I also recommend that you use Google Chrome as a browser.
Ok, let’s get started.
Step 1: find the ID of the page or post to be edited
In order for a change to CSS to be applied to a single page (or to a single post), we must specify the ID of the page in question within our CSS rule.
Specifically, the page ID must appear as a selector.
Let’s take a quick review:
h1 {
font-size: 20px;
}
What you see above is a CSS rule.
Everything before the opening brace is the selector, in this case h1.
The CSS rule will then be applied to all h1 elements.
To change the CSS of a single page, we must specify the page ID in the selector.
So where is the page ID located?
Let’s find out right away.
You can do this to find out the ID of a WordPress page.
Open the page you want to edit in the browser, then open the Google console (anywhere on the page), click the right mouse button, select ‘Inspect element’ and make sure the Elements tab is selected.
Here you should see the HTML and CSS codes of the page.
Well, now inside the HTML, scroll up until you reach the point where you see the opening <body> tag. Before closing> you will see a lot of other codes, this is what interests us.
Now, here look for a tag that is:
postid-NUMBER
OR
page-id-NUMBER (find this example in the image below)
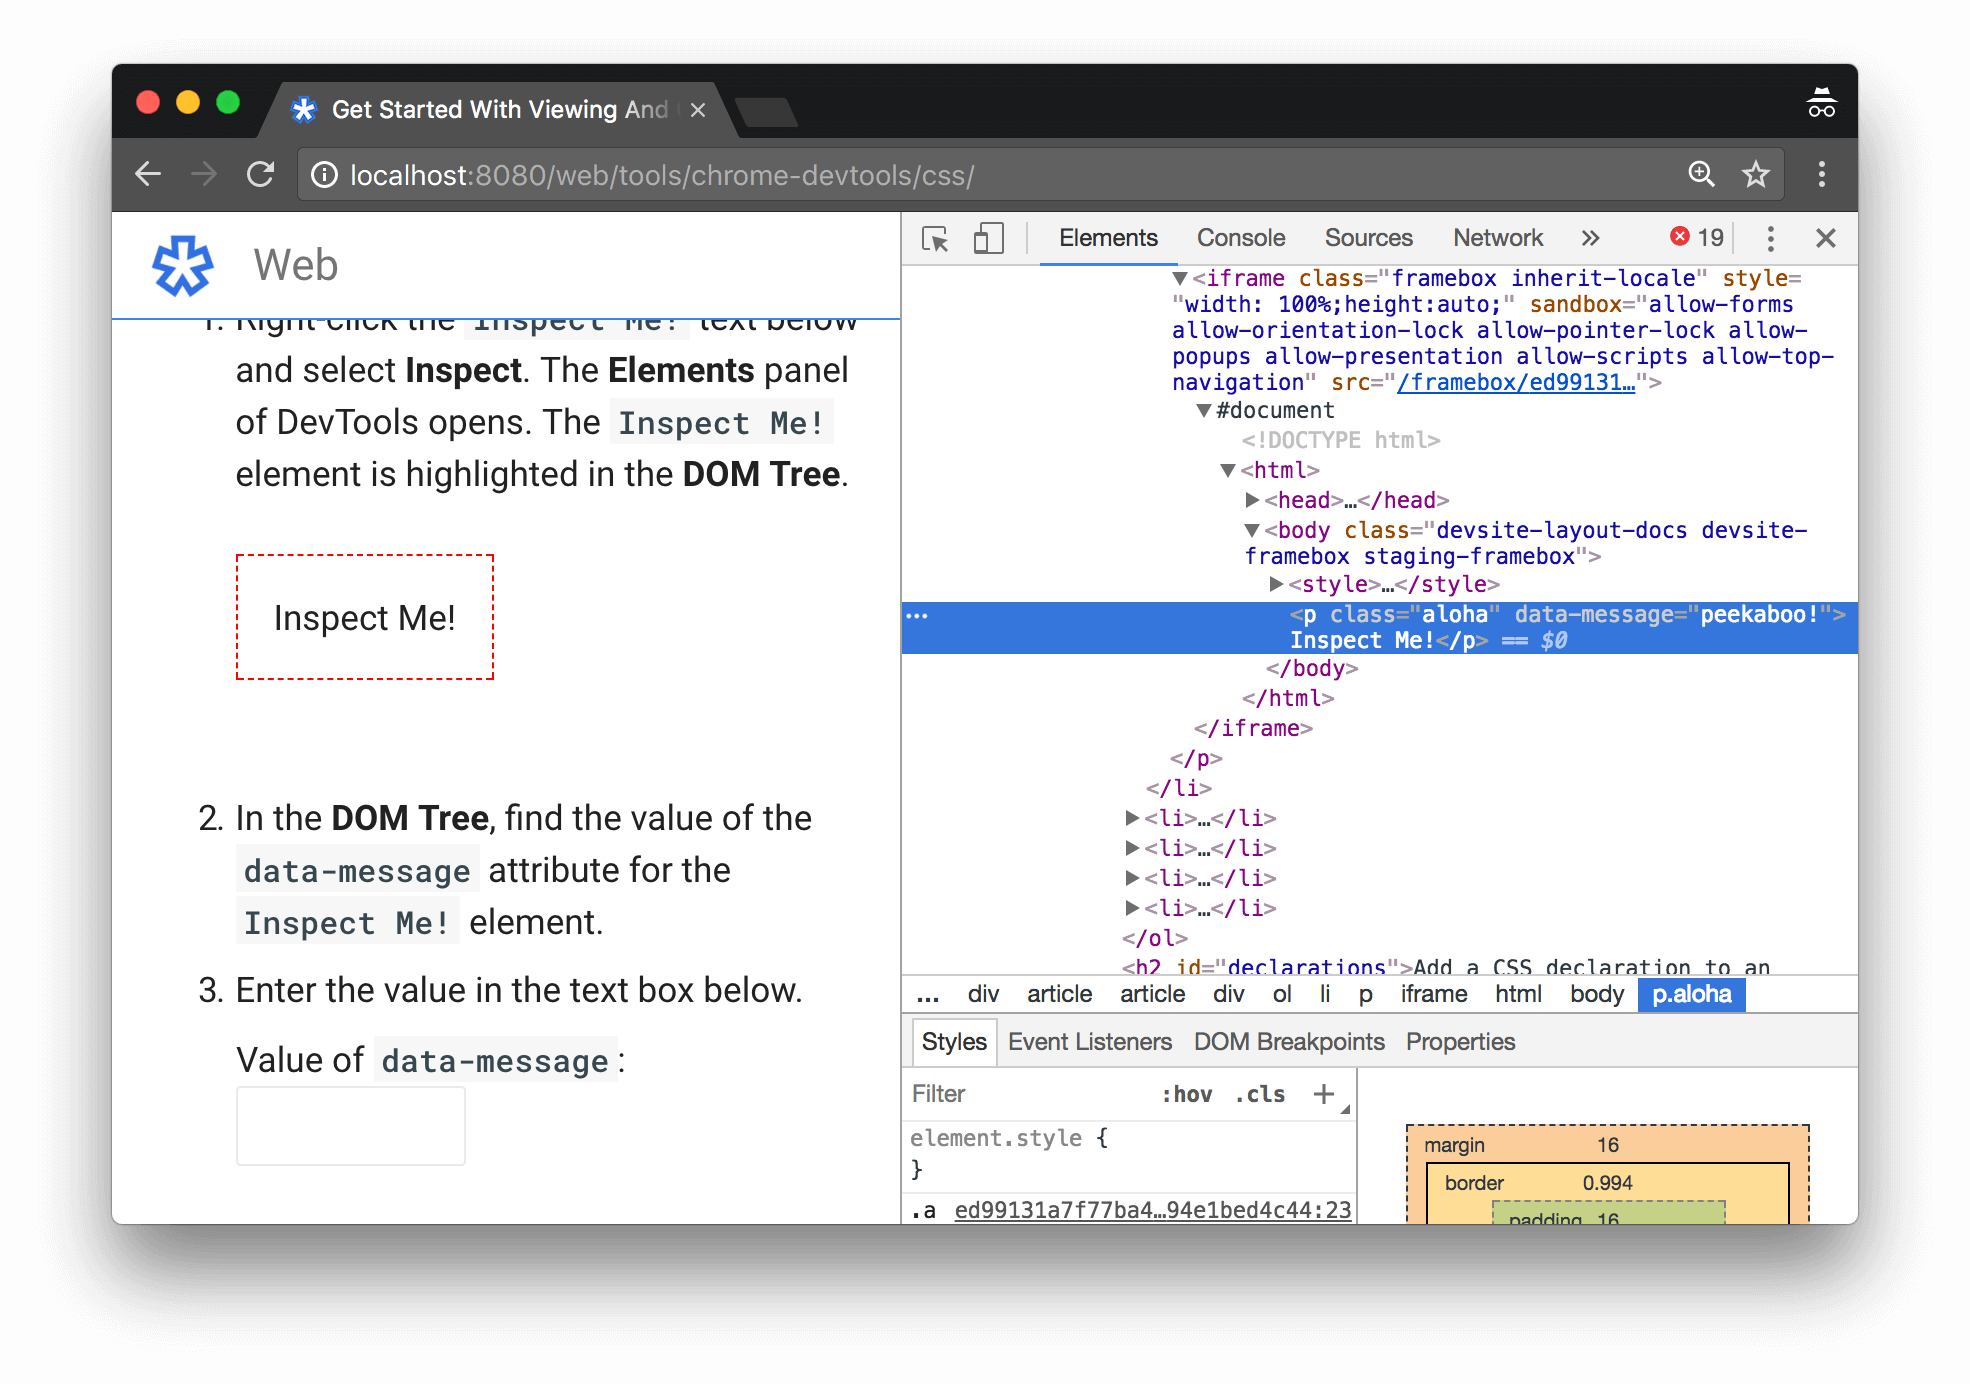
For CSS purposes, in both cases it is a class. In the first case, however, it is a class that serves to identify a post (article), in the second it is used to identify a page.
Step 2: Apply CSS Codes to Your Page or Post
Now that we have the ID, we can change the CSS of a single page quite simply.
First, prepare the CSS rules you want to apply.
I advise you to always do all the necessary tests from the Google console and make a note of them (possibly, on a plain text editor, such as notepad; not on Word).
Then, open the page where the field is located to insert custom CSS codes.
For example, your theme options page or the Customize panel.
Now, at the very beginning of the rule you have prepared, add the class related to the page or post you want to modify, and add a space between this selector and the one that identifies the element to be modified.
In this way:
.page-id-78 h1 {
font-size:20px;
}
Finally, save.
In the example above, only the h1 elements (that is, the titles of larger size) that are located within the page with ID 35 will be modified.
Change the CSS of a single page with a plugin
If you prefer that customizations are managed within individual pages, you can use the Post / Page specific custom CSS plugin.
Thanks to this tool, a new field called Custom CSS will appear within the edit page.
Enter your codes directly in this box, without the need to indicate the page id.
In the general settings of the plugin you can also enter global options, that is, codes that will be inserted within all your new pages or posts.
If I can give you some advice, however, avoid installing a plugin for a task that can also be done with the native features of WordPress.
You will avoid burdening your site and avoid any incompatibilities.
If your changes are not immediately visible
First clear your site’s cache, if you use a caching plugin, as well as your browser cache.
Then, reload the page.
If after this step the changes are still not visible, modify the declaration by adding! Important before the final semicolon.
Adding !Important causes the rule to overwrite the other CSS codes that deal with the element specified in the selector.
But be careful to use !Important in moderation, it should really be your last resort.
That’s all. As you can see, editing a single page’s CSS in WordPress is pretty straightforward.
Plus, thanks to the new functionality to insert CSS codes directly from the Customize panel, you probably already have all the tools you need on your site.
Obviously, you have to invest some time in working on the console and testing CSS codes, but rest assured: all the tests that are done within the Google console are absolutely temporary, visible only to you and ‘disappear’ as soon as you close the window of the browser!
Conclusion
So here are all the ways to customize the appearance of individual pages or articles in WordPress using CSS codes.
Feel free to leave your questions in the comments and we’ll get back to you as soon as possible.