Before you manage the Azure Batch services from a .Net application, you have to create the Azure Batch account and Storage account. You can use the Azure portal, Powershell, Azure CLI, or the Batch Management API to create these accounts.
In this unit, you’ll create an Azure Batch and Azure Storage account using the Azure portal.
Create New Storage Account
- Navigate to the Azure portal in your favorite browser.
- On the Azure portal menu or from the Home page, select Create a resource.
- In the Search the Marketplace search box type storage, then select Storage account.
- Select an existing resource group or create a new one.
- Select Create to open the Create storage account form, as shown in the following screenshot.
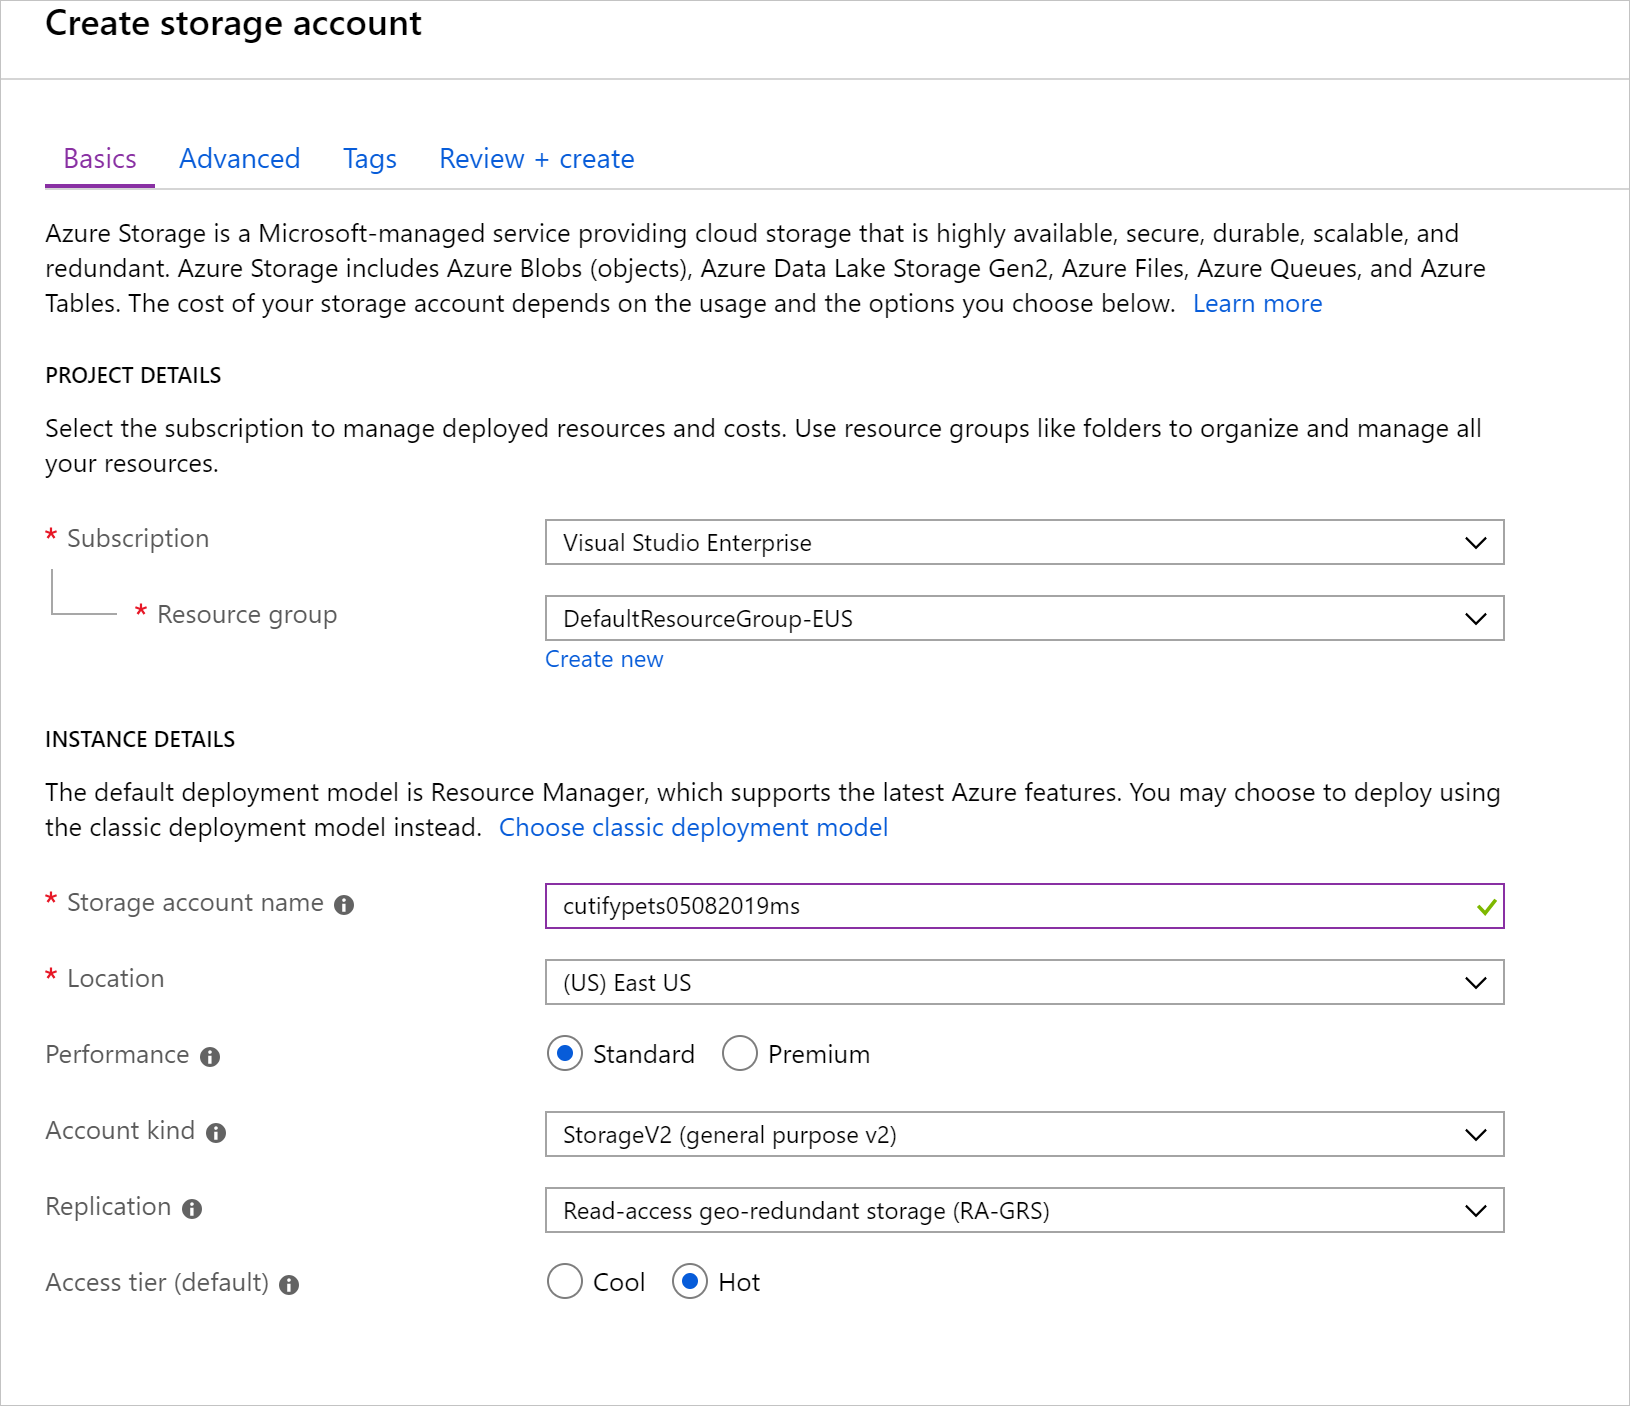
- In the Storage account name field, enter a unique name. An example might be cutifypets<date><your initials>.
- Select a location close to you from the available options.
- Leave all the other options as their defaults and select Review + create, followed by Create.
- Wait for the deployment to complete. We now have a storage account that we’ll use in our processing to store input and output files. We’ll associate this storage account with our Batch account shortly.
Create new Batch Account
In order to create Batch workloads, we need to create an account within the Batch service.
- In the left navigation bar, select Create a resource.
- In the Search the Marketplace search box type batch, then select Batch Service from the list.
- Select Create to open the New Batch account form.
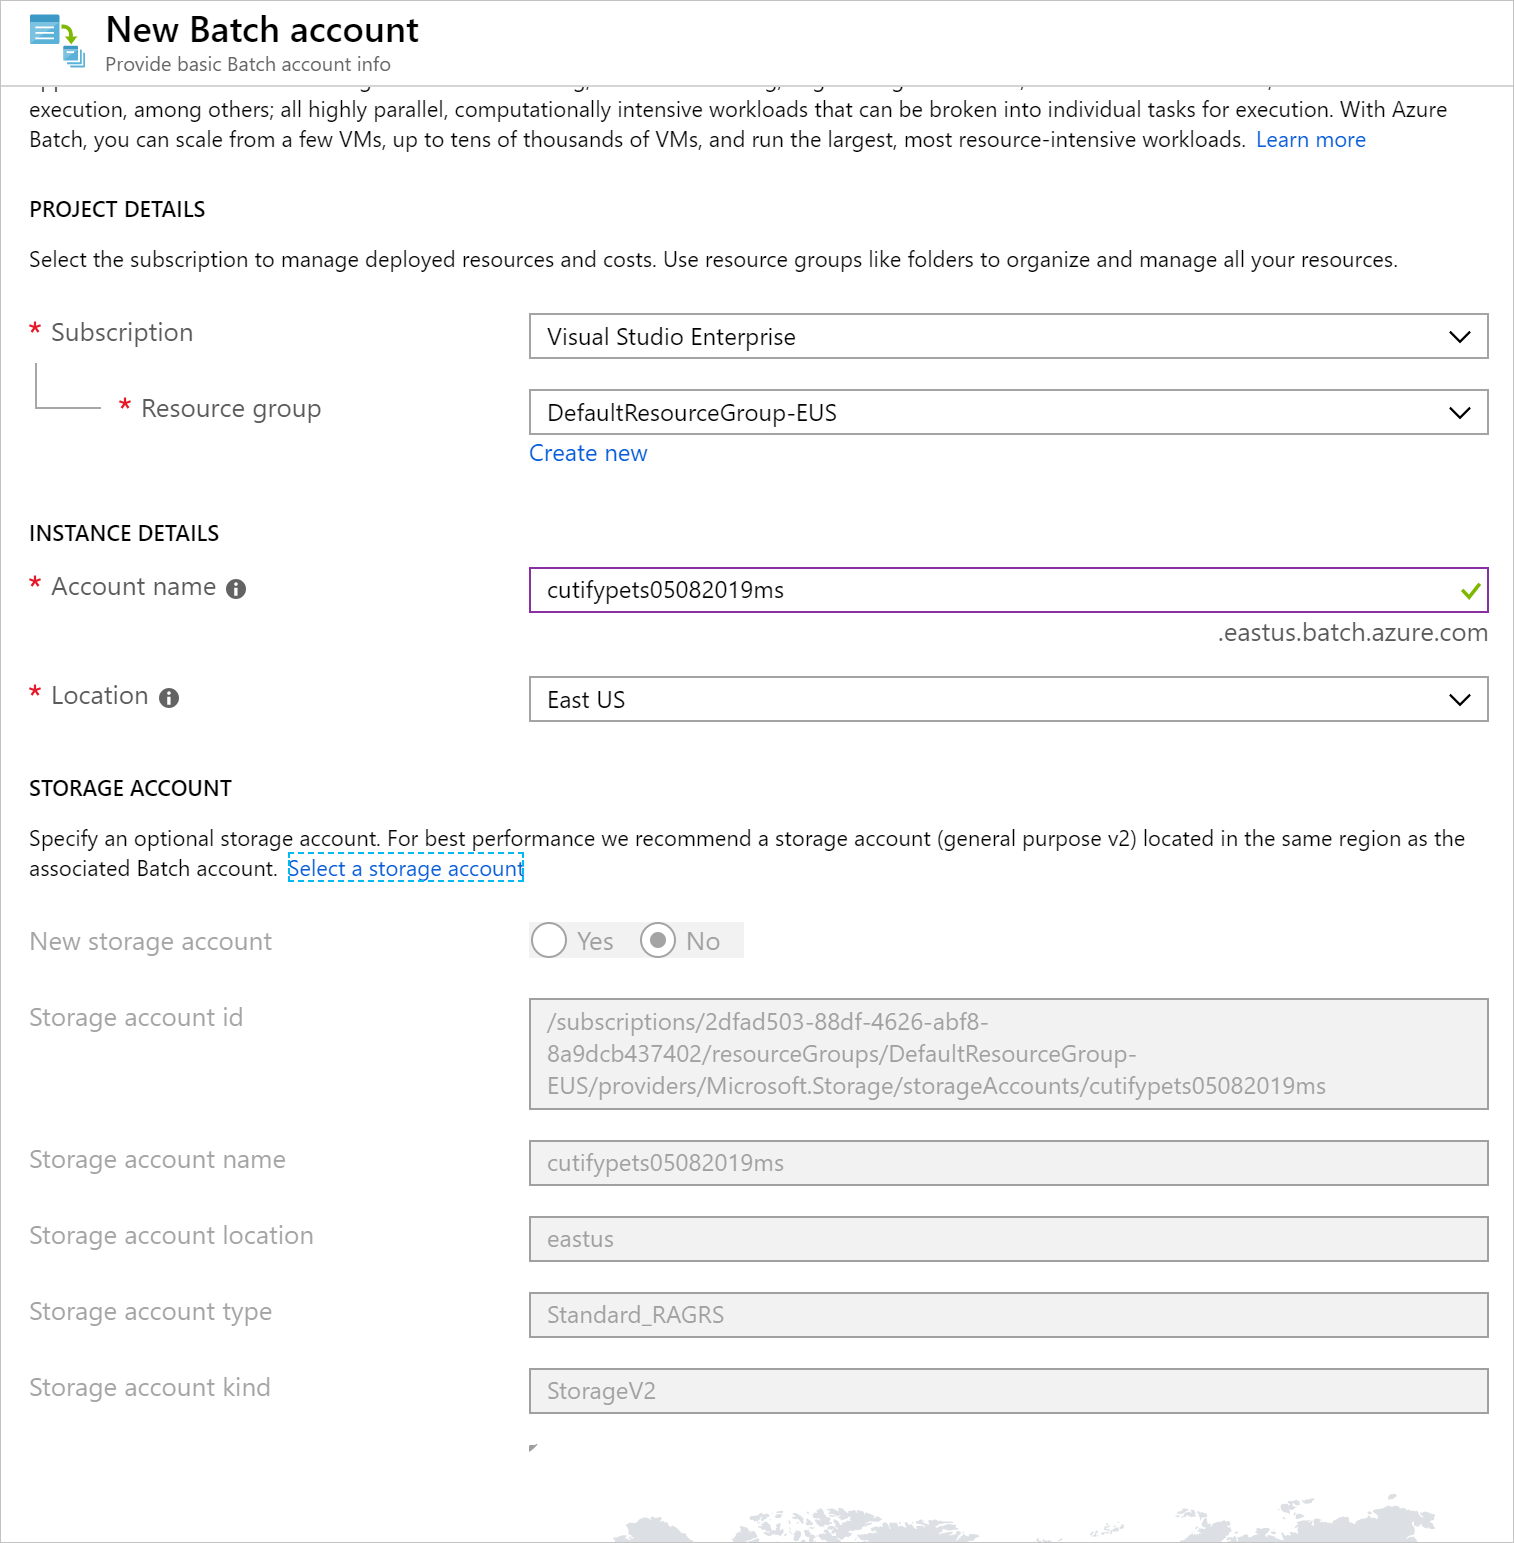
- Select an existing resource group, or create a new one for the resource we are adding in this module. To simplify cleanup once you have finished with this module, we recommend creating a new resource group. Note the name of the resource group you are using – it will be needed throughout these exercises.
- In the Account account name, enter a unique name. For example, you could enter cutifypets<date><your initials>.
- Select the link called Select a storage account, and in the panel that opens select the storage account your created earlier.
- Leaving all the other options as their defaults, select Review + create.
- Select Create.
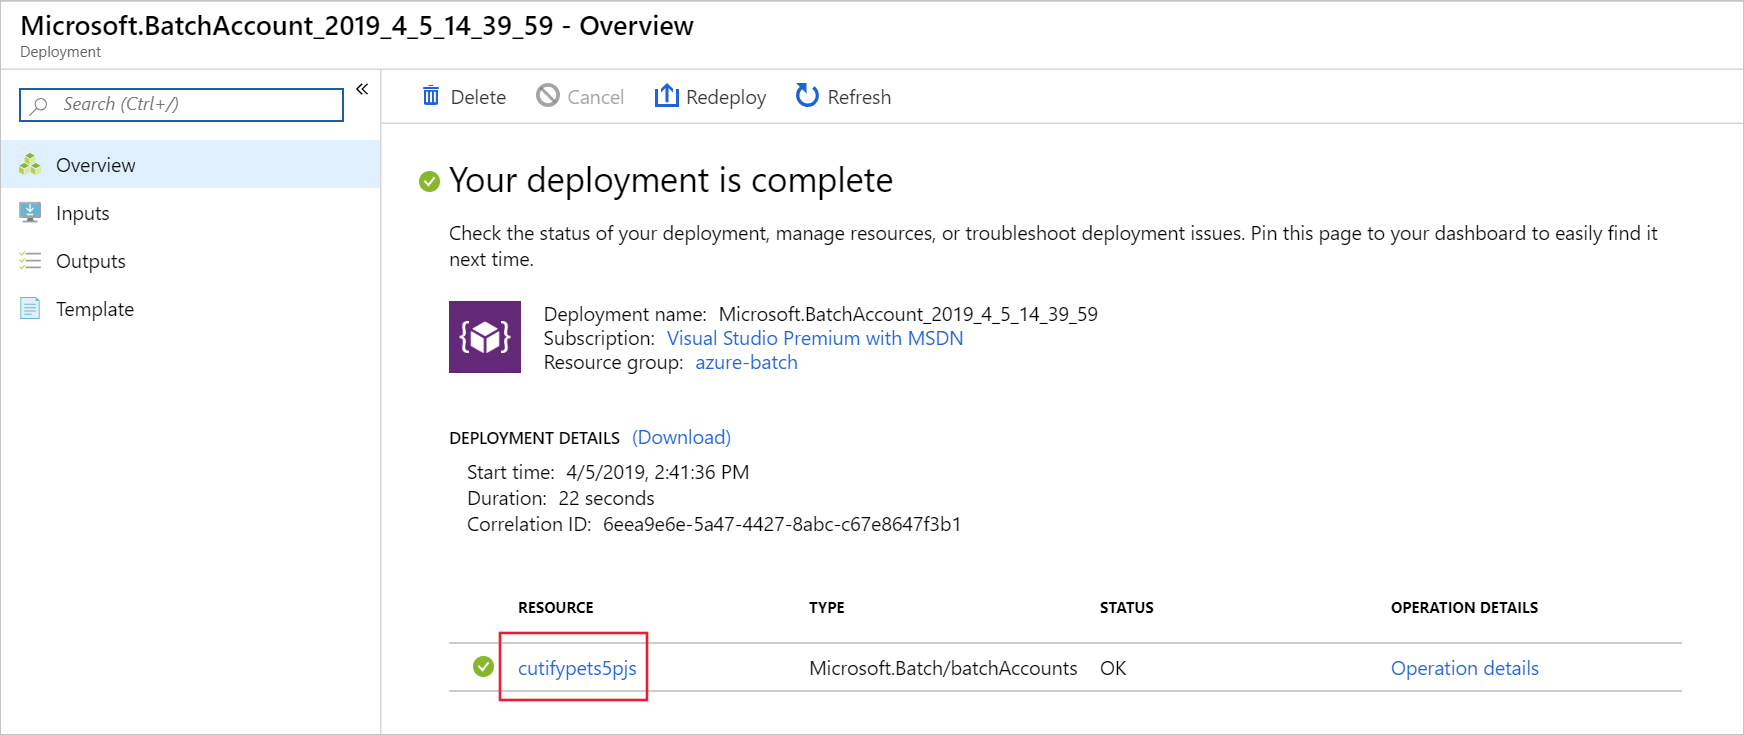
- Wait for the deployment to complete.
- On the Your deployment is complete screen, select the link to the Batch account, as shown in the following screenshot.
Create an application package containing ffmpeg
For our scenario, we’ve decided to enlist the help of FFmpeg to do our video conversion. FFmpeg is a powerful open-source multimedia framework that can, among many other things, decode, encode and transcode multimedia files. it’s a great choice for making website animated GIFs from our pet videos. To use the framework, we’ll add it as an application package to our Batch account. First we need to download a copy from the official FFmpeg site so we can then upload it into our Batch account.
- Open a new tab in your browser, and navigate to https://ffmpeg.zeranoe.com/builds/win64/static/ffmpeg-3.4-win64-static.zip.
- Save the zip file locally.
- Back in the Batch account UI in the portal, select Applications under the Features section of the sidebar, and then select Add to open up the New application configuration form.
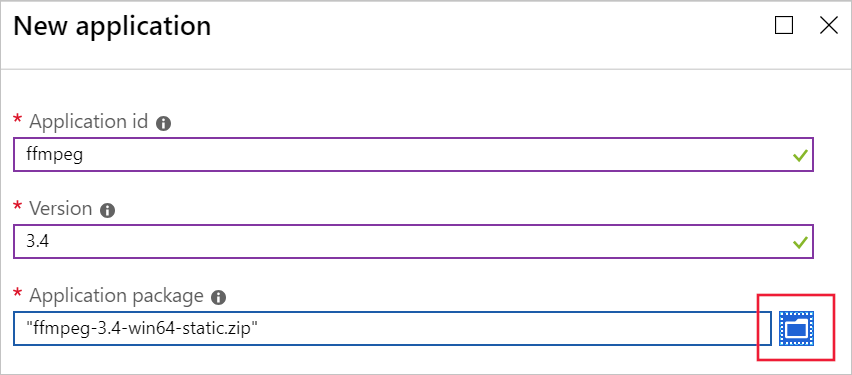
- In Application id type ffmpeg.
- In Version type 3.4.
- In Application package, select the folder icon to the right.
- Navigate to the folder containing ffmpeg-3.4-win64-static.zip that you downloaded, and select Open.
- Select Submit to upload the app to our Batch account. This step can take a few moments, so wait for it to complete.
- Leave the Azure portal open for the next exercise.