How to point Godaddy Domain to Siteground

So you’ve bought a GoDaddy domain and are now looking to connect it to Siteground? Great choice! Siteground is one of the most popular and reliable hosting companies out there, and connecting your domain is a simple process. Here’s a step-by-step guide on how to do it.

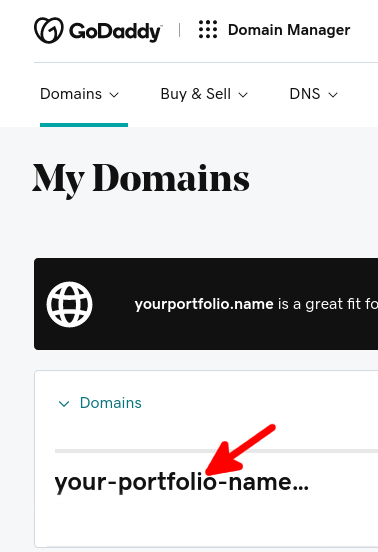
Step 1: Log Into GoDaddy

The first step is to log into your GoDaddy account. Once logged in, click on the ‘Manage’ button next to the domain you’d like to connect to Siteground.

godaddy domain

Step 2: Find Your DNS Settings

On the next page, you’ll see a list of different DNS settings. Scroll down until you find the ‘Nameservers’ section.

Step 3: Change the Nameservers

In the ‘Nameservers’ section, you’ll see a list of the current nameservers that are associated with your domain. To connect the domain to Siteground, you’ll need to change these nameservers to the ones provided by Siteground.

Step 4: Save Your Changes

Once you’ve entered the new nameservers, click on ‘Save Changes’. This will save the changes to your domain and you’ll be ready to connect it to Siteground.

Step 5: Log Into Siteground

The next step is to log into your Siteground account. Once logged in, click on the “Domains” tab and then on the “Add Domain” button.

Step 6: Add Your Domain

On the next page, you’ll be asked to enter the domain name that you want to add. Enter the domain name that you just changed the nameservers for and click on “Add Domain”.

Step 7: Connect Your Domain

Once you’ve added the domain, you’ll see a page with the domain’s DNS settings. Scroll down to the “Nameservers” section and enter the nameservers that you changed in Step 3. Once done, click on “Save”.

And that’s it! You’ve now successfully connected your GoDaddy domain to Siteground. It’s a simple process that shouldn’t take more than a few minutes.

Happy  Deploy!!

How to Create Email Account in Bluehost

An email account is an address that allows a person to send, receive and store emails. To set up an email account, a person must provide an email address, password and other credentials such as a security question. Once this information is provided, the person can access the email account to send, receive and store emails.

Creating an email account with Bluehost is a simple process that can be done in just a few steps. Bluehost is a popular web hosting service that provides a range of hosting solutions, from shared hosting to dedicated servers,With Bluehost, you can create a professional-looking email account for yourself or your business in minutes. Here are the steps to create an email account in Bluehost.

Step 1: Log in to your Bluehost account.

The first step is to log in to your Bluehost account. You can do this either through the Bluehost website or through the Bluehost cPanel.

bluehost-login

Once you are logged in, you will be able to access all of the hosting options available to you.

Step 2: Access the Email Accounts section.

Once you are logged in, you will need to access the Email Accounts section. This can be found in the left-hand menu of the cPanel. Here, you will be able to create, manage, and delete email accounts.

Step 3: Create a new email account.

Once you are in the Email Accounts section, you will need to click the “Create” button.

Step 4: Enter your account details.

Once you have clicked the “Create” button, you will need to enter your account details. This includes the email address, the password, and any other options that you want to set up. Once you have entered all of the required information, click the “Create” button again to finish creating the account.

Step 5: Setup your email account.

Once you have created the email account, you will need to set up the account. You can do this by accessing the “Mail Settings” section of the cPanel. Here, you will be able to set up forwarding, auto-responders, and other account settings.

Step 6: Test your account.

Once you have set up your email account, it is important to test it out. You can do this by sending an email from the account to another email address. If you receive the email, then the account is set up correctly.


Creating an email account in Bluehost is easy and can be done in just a few steps, With Bluehost, you can have a professional-looking email account in minutes. All you need to do is log in to your Bluehost account, access the Email Accounts section, create the account, enter the account details, set up the account, and test it out.

How to Backup a Website in cPanel

If you’re a website owner, backing up your website is essential to protect your data, keep your website up and running, and ensure that you can quickly restore your website if something goes wrong. Fortunately, backing up your website in cPanel is easy, and it just takes a few simple steps to ensure your website is protected.


1. Log into cPanel.

The first step to backing up your website in cPanel is to log in to your cPanel account. You can do this by going to your hosting provider’s website and entering your login credentials. Once you’re logged in, you’ll be able to access cPanel’s features and tools.

2. Find the Backup Tool.

backup

Once you’re logged in to cPanel, you’ll need to find the Backup Tool. This can usually be found in the Files section of cPanel. When you open the Backup Tool, you’ll be presented with several options, including the ability to create a full website backup.

3. Create a Full Website Backup.

The next step is to create a full website backup. To do this, click on the Full Website Backup button. This will generate a backup of your entire website, including all of your files and databases. Once the backup is complete, it will be stored in your cPanel account, and you’ll be able to access it whenever you need it.

4. Download the Backup File.

Once the backup is complete, you’ll need to download the backup file. To do this, click on the download link for the backup file, and save it to your computer. This will ensure that you have a copy of the backup file in case you need it in the future.

5. Store the Backup File.

Once you have the backup file downloaded, it’s important to store it in a safe place. You should store the backup file in a secure location, such as an external hard drive or a cloud storage service. Storing the backup file in a secure location will ensure that it’s safe and accessible in case of an emergency.


Backing up your website in cPanel is a simple process that can help to protect your website from potential problems. By following the steps above, you can quickly and easily create a full website backup, download it, and store it in a secure location. This will ensure that your website is safe and that you can quickly restore it if something goes wrong.