GoDaddy Ultimate Hosting Package Review – My Personal Experience

Some personal experiences from my week long search for a new host. GoDaddy Ultimate package was my first host. Sadly even with their higher level shared hosting my site speed was enough to make customers leave.
So I tried Siteground. Really good speed. Nice backend with a cpanel clone and good optimization plugin, similar to WP Rocket I think.

GoDaddy WordPress Hosting Package Review

Sadly there are a few issues that they could not address. If you want to use the integrated Cloudflare option they offer, you are forced to use WWW URLs. Fine if that’s how you like it but I spent years and money on my branding so that was not an option. Setting up your own non Integrated Cloudflare requires you to set up the name servers/dns with cloudflare so it does become rather complicated. Pity…

Then I went to cloudways, More expensive but more customisable. The backend is not cpanel looking and you do need to know a few old school tricks, like what FTP means. But ultimately it has its own CDN built in (not free) and also cache so pretty good all round.

In the end because of the www issue, I had to go with cloudways, but bottom line is that either of the two are lightyears faster than GoDadday’s Ultimate shared WordPress hosting.

Create a intelligent chatbot with MS power virtual agents

If you do not have a Power Virtual Agents set up already, go to  Virtual Agents in your browser to begin. Supported browsers include Microsoft Edge, Chrome, and Firefox. On the website, select Start Free, and then sign in with your work email address. Note that personal Microsoft accounts are not currently supported.

Next, you’ll choose a name for your chatbot. This can be something generic to your company or specific to the scenario you are tailoring your chatbot to.

Your chatbot is created in the default Power Apps environment that was created for you when you signed up. For most users, this is sufficient. However, if you want to specify a custom Power Apps environment for your Power Virtual Agents for your wordpress hosting services, you can do so by expanding the More options menu and selecting a different environment.

create-new-bot

  1. Once you select Create, the process of creating the first chatbot within a new environment can take up to 15 minutes. Subsequent bots will be created much faster.
  2. After a few minutes, you’ll land on the home page and have an opportunity to play around with the chatbot in read-only mode. You can’t save any edits during this time, but you can explore the overall user interface, look at the topics, experiment with the preloaded User Topics and System Topics, and interact with your chatbot using the Test Canvas.
  3. When the chatbot creation process completes, the banner changes. You now have full functionality in the chatbot and can modify any User or System topic, test out your content changes, or deploy your bot.

Create additional chatbots

If you have already created a chatbot, you can create a new chatbot by selecting the icon on the title bar to open the Bots pane and then selecting New bot.new-bot-icon


Delete a chatbot

You can delete chatbots to remove them from your environment.

  1. Select the chatbot icon on the top menu bar, and then select the chatbot you want to delete.
  2. Select the Settings icon on the top menu bar, then select General settings.general setting
  3. Select Delete bot.

You’ll be asked to confirm the deletion of the bot, after which all chatbot content is immediately deleted.

If your license has expired, you can delete your chatbot(s) by selecting Permanently delete your bots.


As mentioned earlier, a topic defines how a chatbot conversation plays out in Power Virtual Agents.

Create a topic

  1. Go to the Topics tab on the side navigation pane to open the Topics page.navigation-menu
  2. On the topics page, select New topic.
  3. Specify a name, description, and one or more trigger phrases for the topic.A trigger phrase is a phrase that a customer enters in the chat window to start a conversation with the bot. Once the conversation is started, the conversation follows the path you define. You can specify more than one trigger phrase for a topic. You can include punctuation in a trigger phrase, but it is best to use short phrases rather than long sentences.phrases-web 
  4. Select Save topic to add the topic to the topics list.

Design the topic’s conversation path

  1. In the topic details for the topic you want to edit, select Go to authoring canvas.canvas
  2. Power Virtual Agents opens the topic in the authoring canvas and displays the topic’s trigger phrases. The authoring canvas is where you define the conversation path between a customer and the bot.
  3. For existing or system topics, a number of nodes will automatically be created. You can edit these nodes just as you can for other nodes.
  4. When you create a new topic, the Trigger phrases node and a blank Message node are inserted for you.
  5. You can add additional nodes by selecting the Plus (+) icon on the line or branch between or after a node.

Insert nodes

When adding a node, you can choose from five options. Each option has a specific node or nodes that will be inserted into the conversation path.

You can:

  • Ask a question
  • Call an action
  • Show a message
  • Go to another topic
  • End the conversation


add-node-optionsAdditionally, you can Branch based on a condition when inserting a node between existing nodes:conditional-branch


Ask a question:

  1. To have the chatbot ask a question and get a response from the user, select + to add a node, and then Ask a question to add a new Question node.add-new-question
  2. Enter the question phrase in the first text box, Ask a question.
  3. You can choose from several options for the user’s response in the Identify field.These options determine what the chatbot should be listening for in the user’s response.For example, they could be multiple choice options, a number, or a specific string.

    Choose Multiple choice options.

  4. Depending on what you choose in the Identify field, you can enter what options the user should have.For example, since you selected Multiple choice options, you can then enter the options the user can specify in the Options for user field. Each option is presented as a multiple choice button to the user, but users can also type in their answer in the bot.The conversation editor creates separate paths in the conversation, depending on the customer’s response. The conversation path leads the customer to the appropriate resolution for each user response. You can add additional nodes to create branching logic and specify what the chatbot should respond with for each variable.
  5. You can save the user response in a variable to be used later.

Call an action

You can call Power Automate flows by selecting Call an action.

 Note

Power Virtual Agents also enables you to extend your chatbot using Azure Bot Framework Skills. If you have already built and deployed bots in your organization (using Bot Framework pro-code tools) for specific scenarios, you can convert bots to a Skill and embed the Skill within a Power Virtual Agents bot.

Show a message

  1. To specify a response from the bot, select + to add a node, and then Show a message to add a new Message node.
  2. Enter what you want the chatbot to say in the text box. You can apply some basic formatting, such as bold, italics, and numbering.You can also use variables that you have defined elsewhere in your chatbot conversation.

Go to another topic

  1. To automatically have the chatbot move to a separate topic, select + to add a node, and then Go to another topic.
  2. In the flyout menu, select the topic the chatbot should divert to. For example, you might want to send the user to a specific topic about the closure of a store if they ask about store hours for that store.go-to-topic-cloud

End the conversation

When you end the conversation, you can have a survey appear that asks the user if their question or issue was answered or resolved correctly. This information is collected under the customer satisfaction analytics page.

You can also have the conversation handed over to a live agent if you’re using a suitable customer service portal, such as Omnichannel for Customer Service.

  1. At the end of a response that resolves the user’s issue or answers the question, select End the conversation.end-conversation
  2. To end with a customer satisfaction survey, select End with survey.
  3. Select Transfer To Agent to insert a hand-off node that will link with your configured hand-off product. You can also enter a private message to the agent.transfer-to-agent-web

Branch based on a condition

  1. To add branching logic based on variables, select + to add a node, and then Add a condition and Branch based on a condition.
  2. Choose the variable you want to use to determine if the chatbot conversation should branch at this point. For example, if you have set up end-user authentication, then you might want to specify a different message if the user is signed on (which may have happened earlier in the conversation).web

Delete nodes

  1. Select the menu icon on the top of the node’s title.
  2. Select Delete.delete node

What is the Azure compliance documentation?

Azure cloud hosting one of the best world class website hosting services, Here, you learn how to access detailed documentation about legal and regulatory standards and compliance on Azure.

E-commerce is an important part of Tailwind Traders’ sales strategy. Its online retail store  enables customers to easily browse and order products. Customers typically pay by credit card, so Tailwind Traders has a responsibility under the Payment Card Industry (PCI) Data Security Standard (DSS). This global standard, known as PCI DSS, seeks to prevent fraud through increased control of credit card data. The standard applies to any organization that stores, processes, or transmits payment and cardholder data.

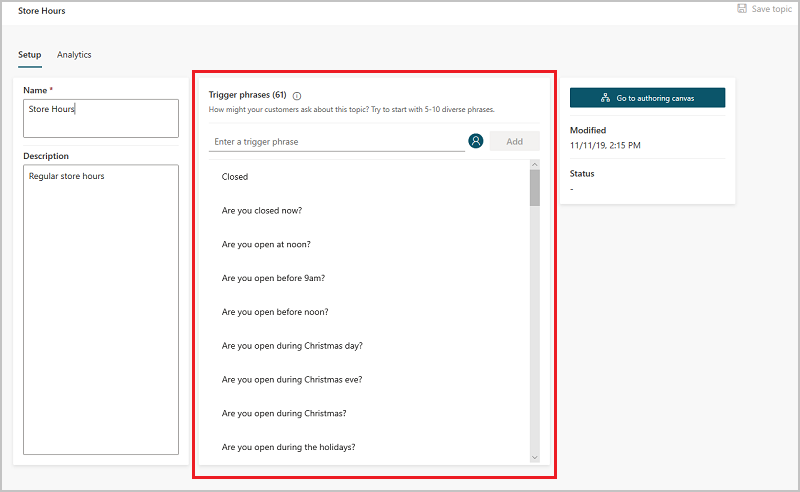
You’ve been tasked with investigating whether hosting the company’s e-commerce application on Azure would be compliant with PCI DSS. You start with the Azure compliance documentation.

Azure compliance documentation

The Azure compliance documentation  provides you with detailed documentation about legal and regulatory standards and compliance on Azure.

Here you find compliance offerings across these categories:

  • Global
  • US government
  • Financial services
  • Health
  • Media and manufacturing
  • Regional

There are also additional compliance resources, such as audit reports, privacy information, compliance implementations and mappings, and white papers and analyst reports. Country and region privacy and compliance guidelines are also included. Some resources might require you to be signed in to your cloud service to access them.

Examine PCI DSS compliance

The legal team at Tailwind Traders wants to learn more about how PCI DSS relates to the company’s e-commerce application on Azure.

As an optional exercise, here you follow along.

  1. Go to the Azure compliance documentation .
  2. Under Financial services, select PCI DSS.
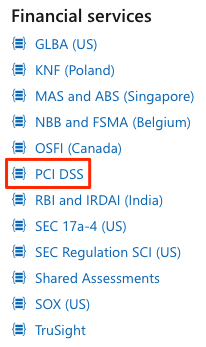
azure

    There you see:

    • An overview of the PCI DSS standard.
    • How PCI DSS applies to Microsoft.
    • Which cloud services are in scope.
    • An overview of the audit cycle.
    • Answers to frequently asked questions.
    • Additional resources and white papers.

Access additional compliance resources

From the Azure compliance documentation , you can access additional compliance resources.

For example, from the Audit reports section, you find a link to audit reports for PCI DSS .


From there, you can access several different files, including the Attestation of Compliance reports and the PCI DSS Shared Responsibility Matrix.

Under Compliance blueprints, you find reference blueprints, or policy definitions, for common standards that you can apply to your Azure subscription. The PCI DSS  blueprint deploys a core set of policies that map to PCI DSS compliance and help you govern your Azure workloads against this standard.compliance-blueprints


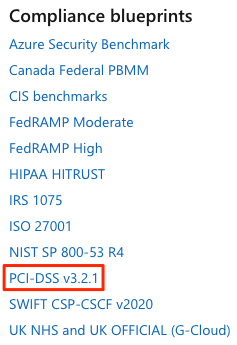
You can then see if the Azure resources in your application architecture have been configured correctly for PCI DSS compliance, or which resources you need to remediate.

Because standards evolve, the Tailwind Traders team might check the audit report periodically to ensure that Azure has any recent changes.
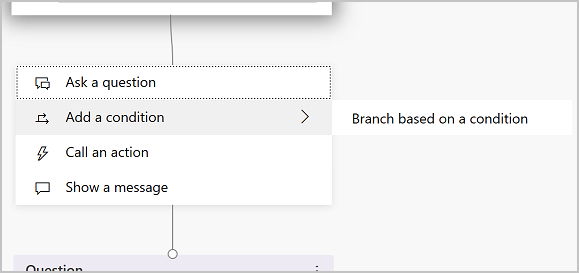
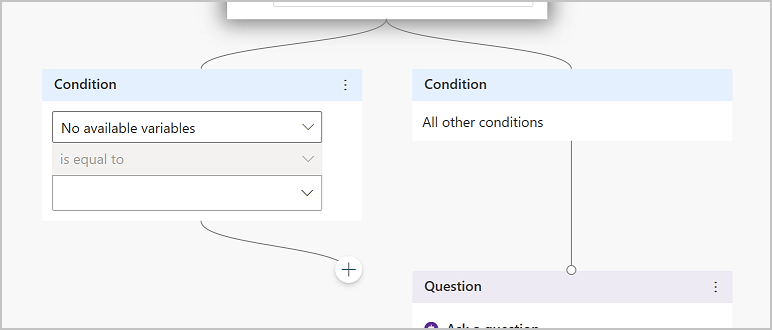
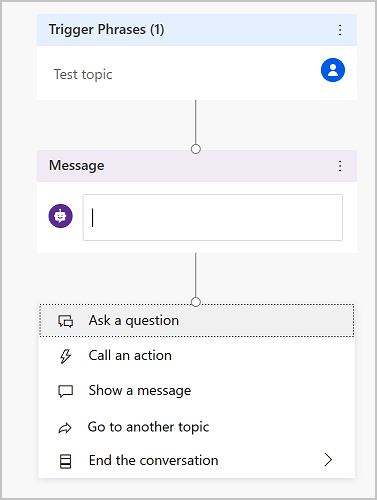