Azure development environment
The Eclipse integrated development environment is a popular tool for Java development. It’s also a great choice for connecting your Java applications to Azure; the Azure Toolkit for Eclipse provides templates and features to streamline Azure integration with your Java applications.
Eclipse
Eclipse is one of the most widely used Java IDEs. It is also a versatile development environment, featuring an extensible plugin architecture that can be used to support languages other than Java. While most Eclipse users are Java developers, Eclipse can also be used to build applications with C++, Python, C, and Ruby.
Eclipse is supported on Windows, macOS, and Linux. The installation process uses the Eclipse installer on all platforms, with few differences in installation procedures between the platforms.
Installing Eclipse for Java or Java EE on any platform is straightforward. The installer will prompt you to choose the packages to install depending on the target language and frameworks.
Azure Toolkit for Eclipse
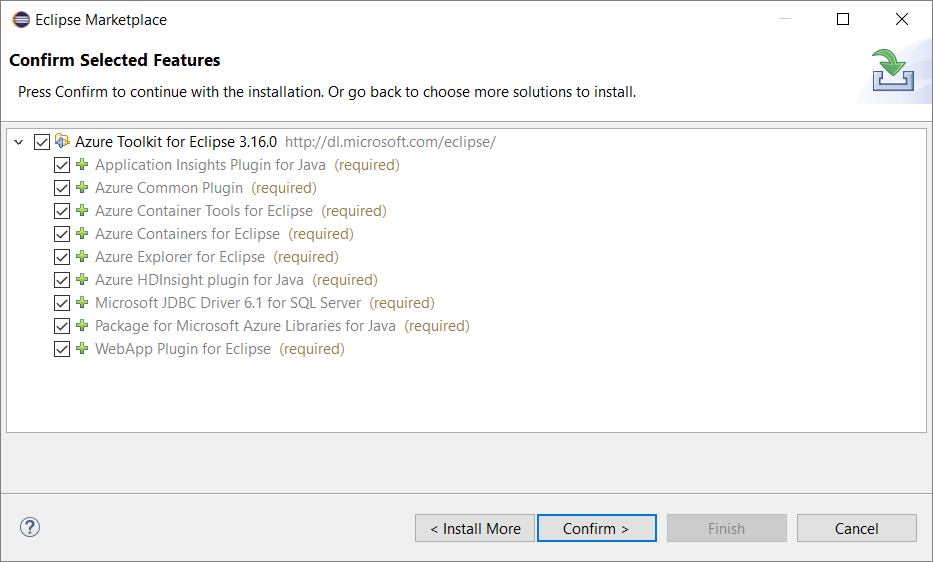
The Azure Toolkit for Eclipse provides templates and functionality that you can use to easily create, develop, test, and deploy cloud applications to Azure from Eclipse. The Azure Toolkit is open source, actively developed, and hosted in GitHub.
The toolkit includes integration templates for Docker containers, HDInsights, Azure documentation, Azure Cache for Redis, storage account operations, and virtual machine management.
The Azure Toolkit is installed through the Eclipse IDE itself; it’s the same procedure on all the supported operating systems. The toolkit is available from the Eclipse Marketplace.
The IntelliJ IDEA is a popular IDE for Java development. It’s also a great choice for connecting your Java applications to Azure; the Azure Toolkit for IntelliJ provides templates and features to streamline Azure integration with your Java applications.
IntelliJ IDEA
IntelliJ IDEA is one of the most widely used Java IDEs. It is also a versatile development environment, featuring an extensible plugin architecture that can be used to support languages other than Java. While designed as a Java IDE, IntelliJ IDEA can also be used to build applications with JavaScript, Scala, Ruby, etc.
IntelliJ IDEA is supported on Windows, macOS, and Linux. The installation process uses the IntelliJ IDEA installer on all platforms, with few differences in installation procedures between the platforms.
Installing IntelliJ IDEA for Java or Java EE on any platform is straightforward. The installer will prompt you to choose the packages to install depending on the target language and frameworks.
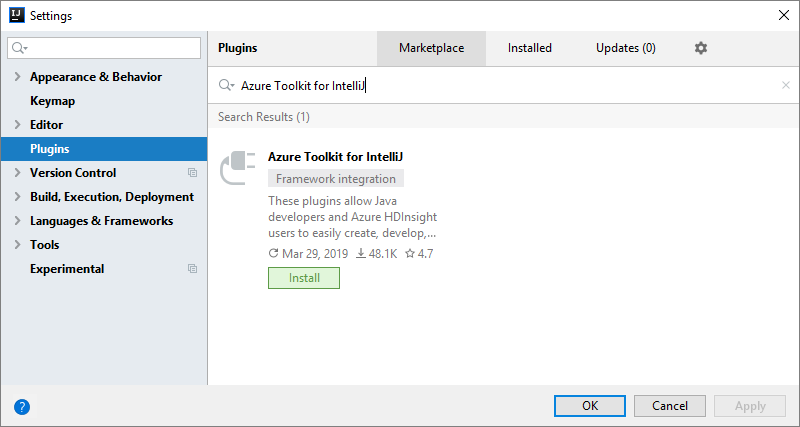
The Azure Toolkit for IntelliJ provides templates and functionality that you can use to easily create, develop, test, and deploy cloud applications to Azure or any managed hosting from IntelliJ IDEA. The Azure Toolkit is open source, actively developed, and hosted in GitHub.
The toolkit includes integration templates for Docker containers, HDInsights, Azure documentation, Azure Cache for Redis, storage account operations, and virtual machine management.
The Azure Toolkit is installed through the IntelliJ IDEA itself; it’s the same procedure on all the supported operating systems. The toolkit is available from the IntelliJ IDEA Marketplace.
Visual Studio Code is a popular choice for developing applications for Azure. It’s lightweight, taking up only megabytes of storage space, and works on Windows, Linux, and macOS.
Visual Studio Code
Visual Studio Code is a free source code editor developed by Microsoft. It supports hundreds of programming languages, includes Git integration, and is designed to connect to Azure cloud services.
However, Visual Studio Code doesn’t include a compiler. Code compilation for specific languages and scenarios is added via extensions.
Extension model
One of the most powerful features of Visual Studio Code is the extension model. Extensions extend the capabilities of Visual Studio Code to add a wide range of new capabilities. For example, extensions can be used to add compilers, add spell checking, and integrate with Azure services.
Extensions are free and can be added from the Extensions page within Visual Studio Code. You can explore the available extensions in the Visual Studio Code Marketplace.
Azure extensions
Many of the extensions target Azure features and products. For example, there are extensions that provide features such as Docker support, subscription management, tooling for the Azure CLI, database access, and Azure Storage API integration.
Install Visual Studio Code and prepare for Azure development
Visual Studio Code supports Windows, Linux, and macOS. To install Visual Studio Code, go to https://code.visualstudio.com/.
Visual Studio is a full featured integrated development environment (IDE) for a wide range of programming application types and languages. Visual Studio has a full set of tools and features that are specifically targeted at developing applications with Microsoft Azure. These features provide support for Azure development, debugging, and deployment tools that are tightly integrated with the IDE.
Visual Studio
Visual Studio is a fully featured IDE used to develop applications for a wide range of application types in including Windows, Android, iOS, web, and Azure.
When installing Visual Studio, you’ll see that several workloads are available. Workloads are collections of libraries and components that define an area of functionality that can be installed. Instead of installing an individual component where you must know and remember the dependencies between each, you can use workloads to do “themed” installations. Visual Studio workloads ensure that all necessary components are included.
The base installation of Visual Studio comes with no tools or libraries for Azure development. For that, you’ll need to include the Azure development workload, which includes the Azure SDKs, tooling, and template projects.
To install Visual Studio, download the installer. The installer will ask which workloads to install; you’ll specify the Azure development workload. Additional functionality is typically added via NuGet packages or Visual Studio extensions.
Visual Studio for Mac
Visual Studio for Mac is a natively designed and developed IDE for macOS. It lets you build solutions for mobile apps on Android and iOS, the web, and .NET Core.
The base installation of Visual Studio for Mac comes with contextual integration of Azure tooling. For example, if you are building a Xamarin app for Android, then the included Connected Services template will provide a link to create a mobile back end with Azure App Service. If you want to create an Azure function, there is a project template under the Cloud category.
If you require tools for Azure features and functions that aren’t in the base installation, you’ll likely need to add NuGet package or a Visual Studio for Mac extension.
To install Visual Studio for Mac, download the installer. The installer will inspect your system to determine what components are required, and whether any components need to be updated.