Get the Azure DevOps project
Here, you make sure that your Azure DevOps organization is set up to complete the rest of this module. You do this by running a template that creates a project for you in Azure DevOps.
The modules in this learning path form a progression, where you follow the Tailspin web team through their DevOps journey. For learning purposes, each module has an associated Azure DevOps project.
Run the template
Run a template that sets up everything for you in your Azure DevOps organization.
To run the template, on the Azure DevOps Demo Generator site, do the following:
- Select Sign In, and accept the usage terms.
- On the Create New Project page, select your Azure DevOps organization, and then enter a project name, such as Space Game – web – Tests.
- Select Fork repository on GitHub, and then select Authorize. If a window appears, authorize access to your GitHub account.
- Select Create Project.
 It takes a few moments for the template to run.
 - Select Navigate to project to go to your project in Azure DevOps.
Set your project’s visibility
Your fork of the Space Game repository on GitHub is initially public. The Azure DevOps template creates a project that’s initially private.
A public GitHub repository is accessible to everyone, whereas a private repository is accessible to you and the people you share it with. In both cases, only collaborators can commit changes to a GitHub repository.
A project on Azure DevOps works the same way. Users who aren’t signed in to the service have read-only access to public projects. Private projects require users to be granted access to the project and signed in to access the services.
For web development learning purposes, you don’t need to change any of these settings right now. But for your own projects, you need to decide what visibility and access you want to provide to others. For example, if your project is open source, you might make both your GitHub repository and your Azure DevOps project public. If your project is closed source, you would likely make both your GitHub repository and your Azure DevOps project private.
Move the work item to Doing
In this section, you assign yourself a work item that relates to this module on Azure Boards. You also move the work item to the Doing state. In practice, you and your team would assign work items at the start of each sprint, or work iteration.
Assigning work in this way gives you a checklist to work from. It gives others on your team visibility into what you’re working on and how much work is left. It also helps the team enforce work in process (WIP) limits so that the team doesn’t take on too much work at one time.
Recall that the team settled on these seven top issues:
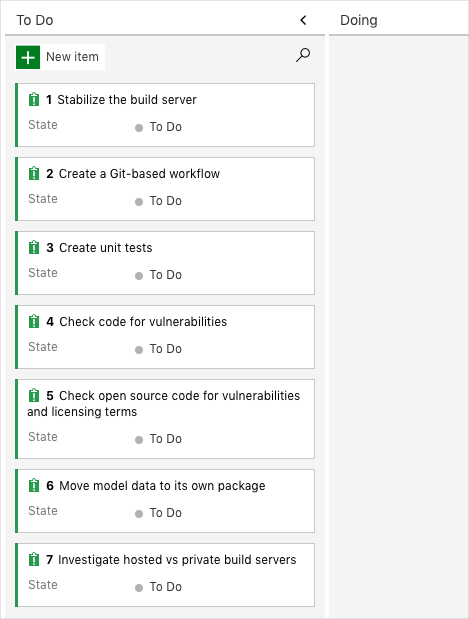
Here you move the third item, Create unit tests, to the Doing column and assign yourself to the work item.
Recall that Create unit tests relates to running unit tests during the build so that Amita doesn’t have to deal with so many regression bugs when she tests out new builds.
To set up the work item:
- In Azure DevOps, go to Boards and then, in the left pane, select Boards.

- In the Create unit tests work item, select the To Do down arrow, and then assign the work item to yourself.

- Drag the work item from the To Do column to the Doing column.
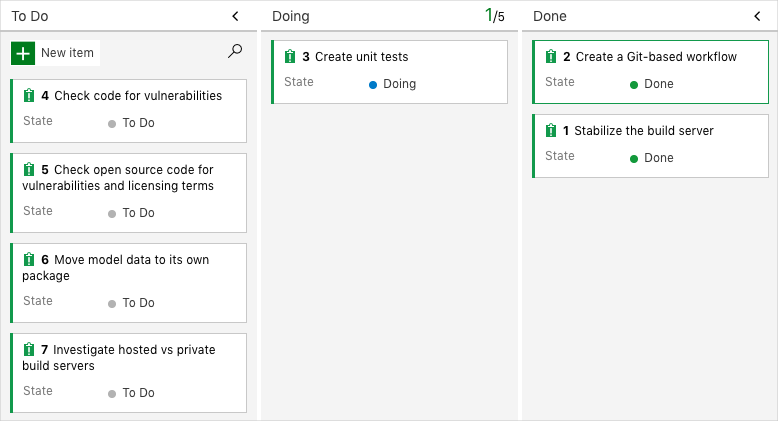
At the end of this module, after you’ve completed the task, you’ll move the card to the Done column.
Set up the project locally
Here, you load the Space Game project in Visual Studio Code, configure Git, clone your repository locally, and set the upstream remote so that you can download starter code.
Open the integrated terminal
Visual Studio Code comes with an integrated terminal, so you can edit files and work from the command line all from one place.
- Start Visual Studio Code.
- On the View menu, select Terminal.
- In the drop-down list, select bash:
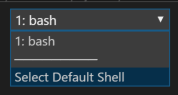
The terminal window lets you choose any shell that’s installed on your system, like Bash, Zsh, and PowerShell.
Here you’ll use Bash. Git for Windows provides Git Bash, which makes it easy to run Git commands.
4. Run the cd command to navigate to the directory you want to work from, like your home directory (~). You can choose a different directory if you want.
cd ~Configure Git
If you’re new to Git and GitHub, you first need to run a few commands to associate your identity with Git and authenticate with GitHub.
Set up Git explains the process in greater detail.
At a minimum, you’ll need to complete the following steps. Run these commands from the integrated terminal:
Set up your project in Visual Studio Code
In this part, you clone your fork locally so that you can make changes and build out your pipeline configuration.
Clone your fork locally
You now have a copy of the Space Game web project in your GitHub account. Now you’ll download, or clone, a copy to your computer so you can work with it.
A clone, just like a fork, is a copy of a repository. When you clone a repository, you can make changes, verify they work as you expect, and then upload those changes back to GitHub. You can also synchronize your local copy with changes other authenticated users have made to GitHub’s copy of your repository.
To clone the Space Game web project to your computer:
- Go to your fork of the Space Game web project (mslearn-tailspin-spacegame-web) on GitHub .
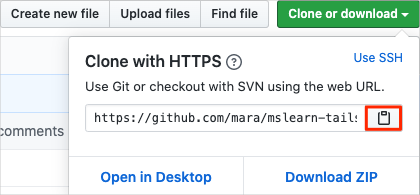
- Select Clone or download. Then select the button next to the URL that’s shown to copy the URL to your clipboard:
- In Visual Studio Code, go to the terminal window.
- In the terminal, move to the directory you want to work from, like your home directory (
~). You can choose a different directory if you want.
cd ~5. Run the git clone command. Replace the URL that’s shown here with the contents of your clipboard:
Bash

git clone https://github.com/your-name/mslearn-tailspin-spacegame-web.git
6. Move to the mslearn-tailspin-spacegame-web directory. This is the root directory of your repository.
Bash

cd mslearn-tailspin-spacegame-web
Set the upstream remote
A remote is a Git repository where team members collaborate (like a repository on GitHub).
Run this git remote command to list your remotes:
Bash

git remote -v
You see that you have both fetch (download) and push (upload) access to your repository:
Output

origin https://github.com/username/mslearn-tailspin-spacegame-web.git (fetch)
origin https://github.com/username/mslearn-tailspin-spacegame-web.git (push)
Origin specifies your repository on GitHub. When you fork code from another repository, it’s common to name the original remote (the one you forked from) as upstream.
Run this git remote add command to create a remote named upstream that points to the Microsoft repository:
Bash

git remote add upstream https://github.com/MicrosoftDocs/mslearn-tailspin-spacegame-web.git
Run git remote a second time to see the changes:
Bash

git remote -v
You see that you still have both fetch (download) and push (upload) access to your repository. You also now have fetch access from the Microsoft repository:
Output

origin https://github.com/username/mslearn-tailspin-spacegame-web.git (fetch)
origin https://github.com/username/mslearn-tailspin-spacegame-web.git (push)
upstream https://github.com/MicrosoftDocs/mslearn-tailspin-spacegame-web.git (fetch)
Open the project in the file explorer
In Visual Studio Code, your terminal window points to the root directory of the Space Game web project. You’ll now open the project from the file explorer so you can view its structure and work with files.
On the File menu, select Open.
Navigate to the root directory of the Space Game web project.
(You can run the pwd command in the terminal window to see the full path if you need a reminder.)
You see the directory and file tree in the file explorer.
You’re now set up to work with the Space Game source code and your Azure Pipelines configuration from your local development environment.